For the last several years, Gomo Authoring has been availableas a cloud-based authoring tool to create eLearning that works on desktop and onmobile devices. It was one of the first to offer this capability, and its featureset has continued to grow. The Gomo Authoring capability is part of the Gomo LearningSuite, which also offers hosting and tracking of your eLearning projects createdwith Gomo Authoring. However, you can use Gomo Authoring alone without subscribingto the full Suite. This review focuses on the Authoring tool alone. If you’re interestedin the Suite, you can find out more here.
Creating a project—first steps
When you begin, you can choose to create a sample project ora new project (Figure 1).

Figure 1: Choosing a project to create
A sample project lets you start with a template and structure,as Figure 2 shows. This is the project view screen and is a graphical representationof what your course looks like.
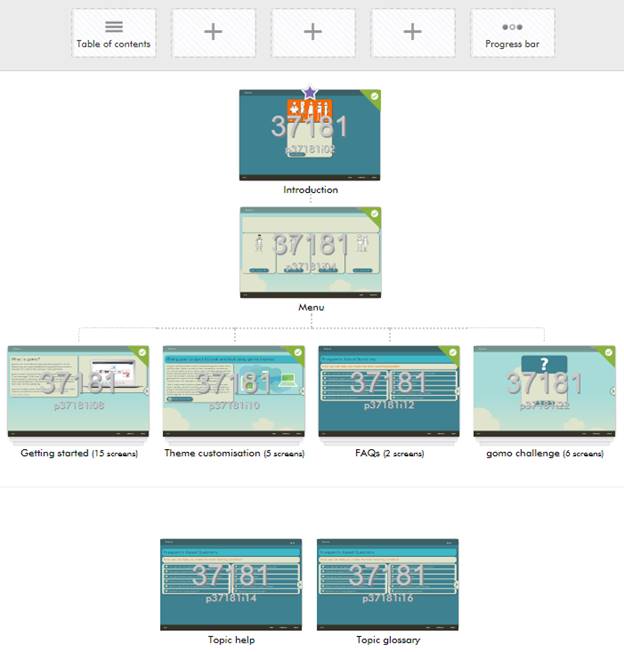
Figure 2: A sample Gomo project
Most of the time, you’ll be creating a new project (Figure 3).A wizard will ask you to create a name and description and to choose several otheroptions before anything else. The wizard asks you to fill in project details, choosea theme, and set up your project content configuration. Themes are flexible, andyou can customize them to give you the look and branding that you need. The Gomoteam can also provide a custom theme for specific branding needs for an additionalcharge. Themes are separate from the content, so if your branding changes, a quickchange to the theme will dynamically change all courses created using that theme.
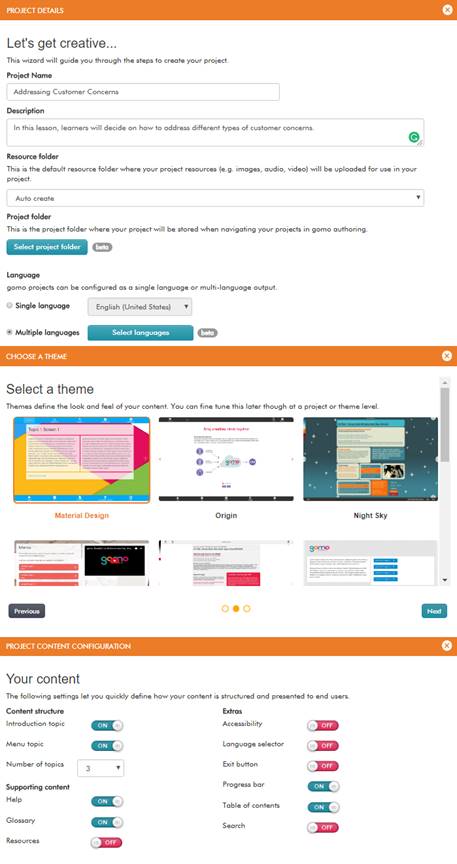
Figure 3: New project choices
Notice the focus on languages here under Project Details. Gomoexcels at allowing you to deliver your learning in one language or many. As you’lllikely be using a translation service for each language, Gomo allows you to exportan XLIFF file, which is translation service providers’ preferred method. Once youreceive the translated file, you simply import that back in and Gomo will pull fromthat language file when the learner selects it. You can select from over 100 languagesand dialects.
Creating a project—next steps
Next, you’ll see a set of choices like that in Figure 2. Notethe plus signs at the top of the figure. When you click one, you’ll see the choicesfor navigation items Figure 4 shows. When you play back your lesson, those itemsappear at the top, as Figure 5 shows.
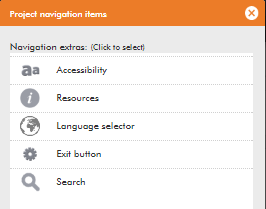
Figure 4: Project navigation items
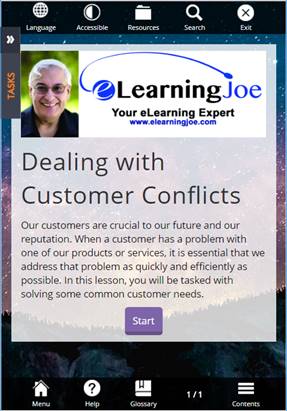
Figure 5: Navigation items selected duringsetup appear at top of window
Each of the above, of course, is customizable.
Adding and editing content
When you open a content area, clicking any element will updatea Properties panel on the right to reflect that element’s properties and give youan opportunity to open an editing dialog. See Figure 6. Notice that you have navigationand asset options on the left. While editing, you can collapse both the left andright panels if you would like to zoom in on the content area.
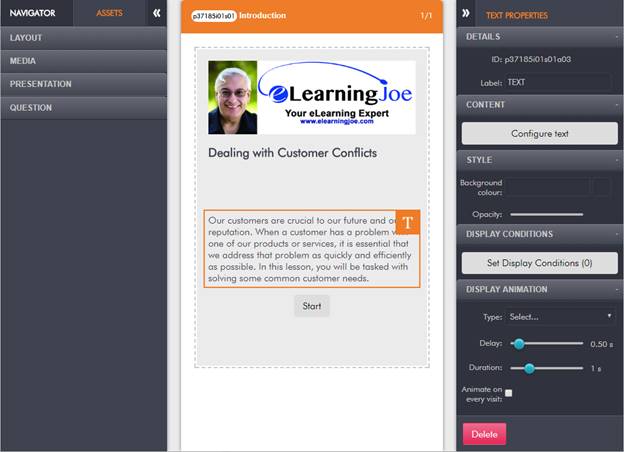
Figure 6: Editing and adding elements
The Navigator tab on the left lets you jump to other screensin the lesson and gives you the opportunity to create new screens. As you can seein Figure 6, the Assets tab lets you change the layout of the current screenand add media, a presentation element, or a question.
Layout
The Layout option lets you insert an empty content block. Bydefault, the content block will have two columns, though you can change the layoutto three or four columns. Columns are the way that Gomo adjusts the screen to provideresponsively designed screens, meaning that it will adjust and move columns so thatthe output looks good on any device. Using one column essentially means that yourdesign won’t be very responsive, as there isn’t much that can be repositioned. Thereare different methods for creating responsively designed sites. Columns are notthe most powerful method of creating responsively designed eLearning, but thisapproach is easier than some others, so it is well worth considering if your needsare not too strict. Learn more about responsive eLearning design here.
Media
You can insert audio, video, and iFrames in the current screenunder the Media option. iFrames let you embed YouTube and Vimeo videos into yourlearning. You can embed anything else that is hosted on a web server, such as 3-Dmodeling, Google Maps, and surveys by Survey Monkey.
Presentation
This category of options comprises most of the content you caninsert onto a screen. (See Figure 7.) They are a mix of static and interactive items.However, you can make most static elements interactive because they will let youattach Actions to them. The list of actions may differ depending on the objectsto which you’re attaching them. (See Figure 8.) I really like that you can attachas many actions as you wish to any object.
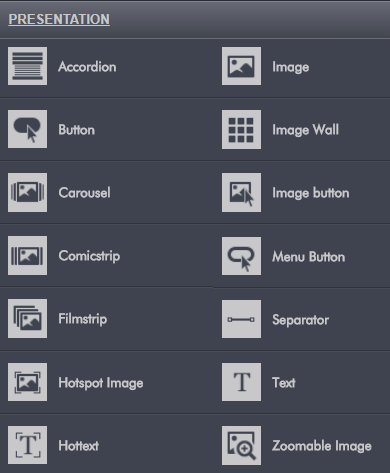
Figure 7: Presentation choices

Figure 8: Actions list
Question
Quizzes and questions, of course, are essential to learning,and Gomo includes a good variety, as you can see in Figure 9. However, notably missingare drag-and-drop questions, which I’m told will be added in the near future.
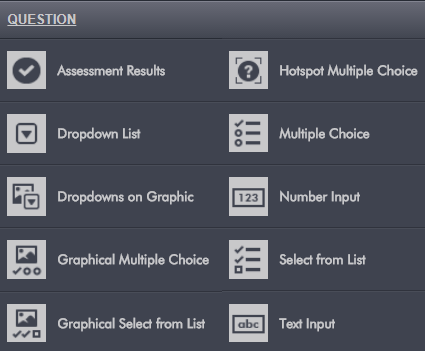
Figure 9: Question choices
Questions are not inflexible; you can create separate feedbacksfor different answers in most cases. You can also create your own question screensrather than use one of the choices in Figure 9.
You can create banks of questions and choose randomly from thebanks. You can let learners take a quiz again if they don’t pass on the first try,and you can choose to show them only the questions they answered incorrectly duringtheir prior attempt.
Previewing your project
You can preview your project at any point. When you do, you canresize the width of your browser to see how your content will look at any width.You also will see a convenient dropdown menu that lets you choose between the typicaldesktop, tablet, and smartphone views. In the case of the tablet and smartphoneviews, you can also choose between landscape and portrait modes. These prove tobe a fast way of determining that your content will look good in every view. (SeeFigure 10.)
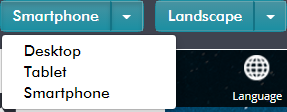
Figure 10: Preview options
Further customizing your project
There are a few other important options in Gomo.
Display animation
You can use animation effects on screen elements. Select theanimation, how long to delay before it’s applied, its duration, and whether theanimation should occur on subsequent visits to the same screen. Figure 11 showsthe animation choices.
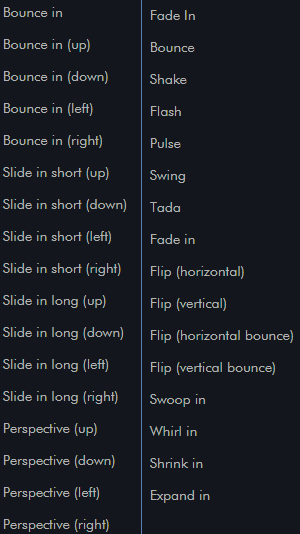
Figure 11: Animation choices
Display conditions
One of the most powerful options in Gomo is the ability to showscreen elements only upon certain conditions. Figure 12 lists the condition types.Notice that you can create your own user variables as well as custom variables,which are those that refer to specific elements within your lesson. Every elementhas a unique ID attached to it, called an Asset ID, and custom variables use these.

Figure 12: Display conditions
Publishing your project and preparing it for tracking
When you’re ready to publish your file, you can choose to uploadit to Gomo Hosting or to NetDimensions. Both Gomo and NetDimensions are owned byLearning Technologies Group (LTG). You can also download the project as a SCORMor xAPI zip file. (See Figure 13.)
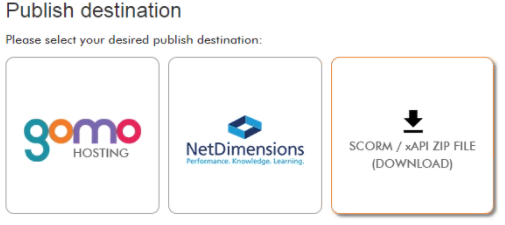
Figure 13: Publishing options
Hosting and analytics
For those of you who either don’t have an LMS or want differentdistribution methods, as an add-on, Gomo gives you the option of hosting your courseswith them. This opens up multiple methods of distribution as well as xAPI analytics,developed by another LTG company, Rustici Software.
Options include Gomo Central, Gomo Central Native App, usingan embed code, creating a direct link, and creating a Gomo LMS Wrapper. You alsobenefit from Gomo’s built-in xAPI (Experience API, aka Tin Can) reporting dashboardthat gives you an easy and visual way to analyze learner data. A dashboard makesit all easy. Find out more here.
More information
You can check out pricing and other information here. You can also sign up fora free 21-day trial.
Final thoughts
I realized after working in Gomo for a while that there weremore layers to the site than I expected. Being able to set variables and customvariables, and the wide variety of customizations possible, were a pleasant surprise.In my view, Gomo represents a very good solution for delivering learning that looksgood on different devices.
From the editor: Want more?
We invite you to download our 2017 report ResearchSpotlight: Next Generation of Asynchronous Authoring Tools. Co-authored by JoeGanci, the report provides major updates on the impact of new technologies, as wellas functional requirements for authoring tool selection and additional featuresessential in today’s asynchronous authoring environment.