
Camtasia9 was released today.
Camtasiais a tool that I spend a great deal of time using. As is true of many users, Iuse a subset of the features and ignore many others that are less useful to me.With the release of Camtasia 9, TechSmith is trying to further cement theproduction software as the “Swiss Army knife” of eLearning tools. A fullyfeatured tool, Camtasia allows you to edit video and produce quizzes, and it comesstocked with dozens of visual effects and transitions.
Camtasiadoes have a 30-day trial edition you can use to follow along withthese tutorials if you have not yet purchased Camtasia 9 (Figure 1). Camtasiais cross-platform: Windows and Mac machines can use the same development files.
(Editor’s note: Ifviewing this article on a smartphone or a tablet, you may find that placingyour device in landscape orientation will make some of the figures morelegible.)
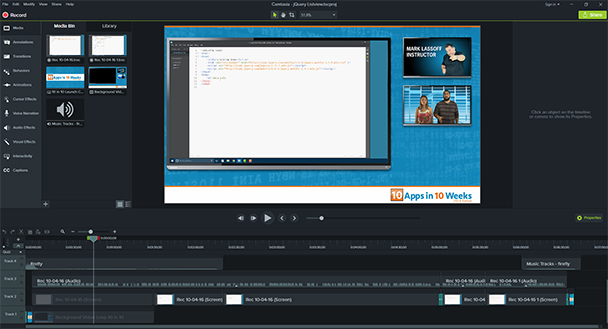
Figure1: The new Camtasia 9 interface whileediting an instructional video
Let’stake a look at three production techniques with the new Camtasia 9 that willallow you to see exactly what the new software can do and how it can help youcreate more engaging content.
Green screen
Assumingyou have at least a minimal green screen setup, you can edit any green screenvideo you shoot in Camtasia 9 quite easily. Remember that quality green screenis all about the lighting—a well-lit video will be much easier to compositethan one with shadows and inconsistencies. Assuming you have a quality greenscreen video, let’s go through the step-by-step process of editing a greenscreen video in Camtasia 9:
1) Open Camtasia 9 and, from theinitial dialog box, click the New Project button. This will open the primaryinterface (Figure 2).
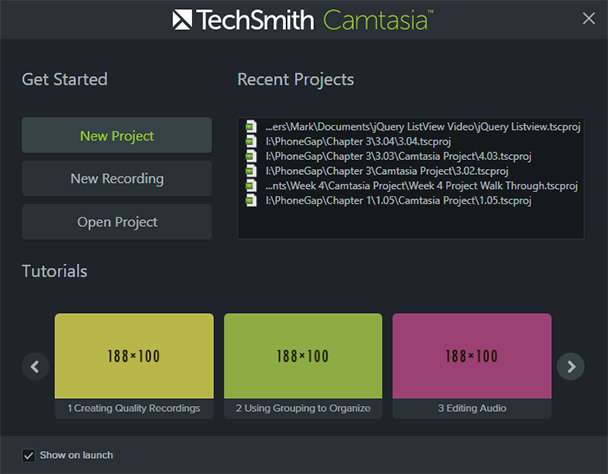
Figure 2: OpeningCamtasia 9
2) Click the Import Media button, andchoose the background you’d like to use for the video. This background can be astill image, an animation, or a video. I’m going to choose a game animationthat we used for a video game development course.
3) In the bottom left corner of theMedia Bin tab, you’ll see a + button. Click it and choose Import Media from themenu to import the green screen video that you’d like to overlay on thebackground you just imported. This video should be the consistently lit greenscreen video you shot. (Figure 3 shows the result of this step.)
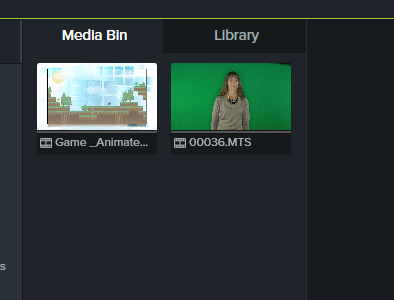
Figure3: Media Bin with background animation and the green screen video imported
4) Turn your attention to the timelinein the bottom part of the interface. Right-click on Track 1 and choose InsertTrack, then Above. Track 2 will appear above Track 1.
5) Drag your background video ontoTrack 1. Drag your green screen video onto Track 2 (Figure 4).

Figure 4:The timeline after dragging the videos into place on the tracks
6) If your background on Track 1 isshorter than the green screen video, you need to extend it by dragging theright side of the background clip to be even with the end of the green screenclip (in the case of a still image). If you have a background video, you’llneed to drag it from the Media Bin onto Track 1 until both tracks are even(Figure 5).
![]()
Figure 5:The background animation loop has been inserted multiple times so that theclips are the same length
(Asmall warning here—with this new version of Camtasia, be sure to drag clipsaround the timeline from the bottom half of the clip. If you click on the topof the clip on the timeline, you might inadvertently insert a quiz. If you dothis, just hit CTRL-Z to undo.)
7) Select the green screen clip byclicking on it. Then, from the menu on the left side of the screen, chooseVisual Effects.
8) Drag the Remove a Color effect ontothe clip on Track 2. The effect menu will appear on the right side of theinterface. Adjust the Tolerance slider to the right until the green backgrounddisappears. Be careful that other colors you want to retain don’t disappear aswell (Figure 6).

Figure 6:The background has been removed, although you can make some improvements here
9) Adjust the Softness and Defringe slidersto remove any green edges around your speaker. You may want to press the space barto roll the clip and see how the edges of your speaker look while moving. (Onlya fast computer will composite green screen on the fly without stuttering.)
10) Finally, click the green screen clipagain, and position and size the speaker as you’d like using the bounding boxaround the clip in the preview area (Figure 7).

Figure 7:Final composite with speaker sized and positioned
11) Test your video with the space bar. Usethe Share drop-down menu to export your movie and watch it be composited andoutput.
Greenscreen in about 10 steps—not too shabby!
Ken Burns effect
Thedocumentary filmmaker Ken Burns used this effect so much, it was named afterhim. Basically, it’s a pan over a still image. You’ll need an image that’sbigger than the video you’re creating. Since I’m creating a video that’s 1920 x1080 (HD), I’ll need an image 30 to 50 percent larger.
1) Open a new Camtasia project.
2) Import the image you are going touse to the Media Bin. We’ve provided landscape_image.jpg with this tutorial for you to practice.
3) Using the zoom control at the top ofthe screen (above the preview), zoom out to 25 percent. Drag your image ontoTrack 1 and position it using the sizing handles and drag, as pictured inFigure 8 below.

Figure 8:Look carefully—not all of the landscape image is visible in the preview window
4) Right-click on the image on Track 1,choose Duration, and set the duration to 30 seconds.
5) Position the playhead toward the endof the 30-second clip. From the menu on the left side of the screen, chooseAnimations. Make sure your Zoom-n-Pan tab is active and visible (Figure 9).

Figure9: The Zoom-n-Pan tab with image loaded
6) Drag the square in the Zoom-n-Pantab to the right so that it appears to pan through the image with the imagemoving toward the left. You’ll now notice a small arrow on Track 1 in yourtimeline (Figure 10).
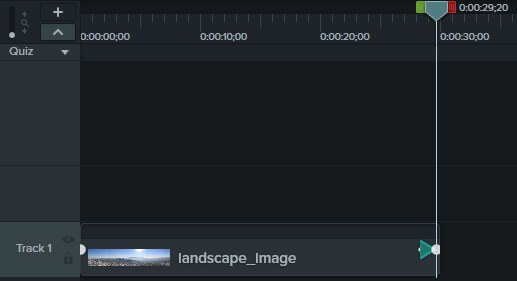
7) Drag the arrow to the left so itextends the length of the clip. Press the space bar and enjoy the Ken Burnseffect! (Figure 11.)
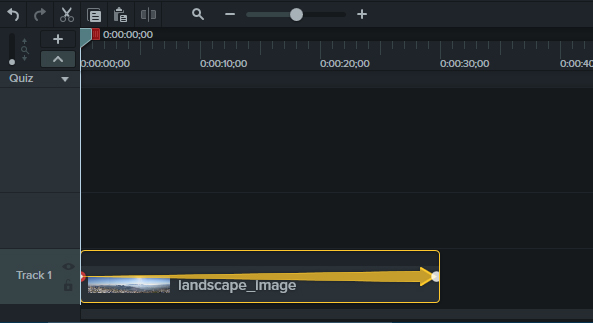
Figure 11: Themotion effect now applied for the proper length of time
It’samazing how just a little subtle motion can take a boring clip and make it moreinteresting. You can experiment with zoom and pan, or a combination of both,and create some pretty interesting clips in your learning projects.
Picture-in-picture
Thisis a pretty cool effect where you can combine elements in a single screen toincrease visual engagement. There are just a few steps. They key is having anappropriate image for the picture-in-picture effect. I like to use somethingsimilar to this:
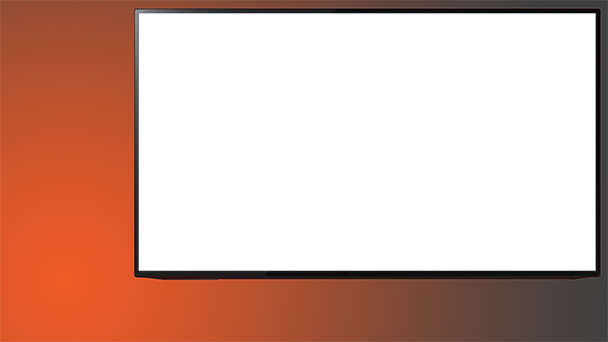
Figure12: Picture-in-picture framing
1) In a new Camtasia project, click theImport Media button and import your picture-in-picture background layer.
2) Right-click on Track 1 and insert anew track above it. This will be Track 2. Drag your background onto Track 2.
3) Import the video you’d like to playinside the television frame, and place it below the background on Track 1. (Notethat the area inside the television is transparent, so you’ll be able to seewhat’s below.)
4) Drag the right side of the Track 2clip so it’s even on the timeline with Track 1. You want both clips to be thesame length (Figure 13).

Figure 13:The interface with both tracks imported
5) Select your bottom layer and, usingthe sizing handles, carefully position it inside the television. It may help toclick the lock icon on Track 2 to lock it in place while you do this (Figure 14).
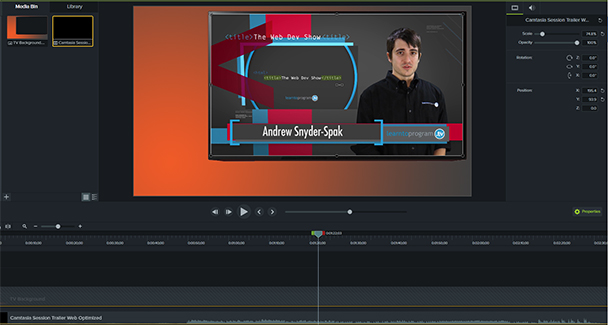
Figure 14:The video layer now in position
6)Inserta track above Track 2, and insert any other items you want for your clip. Makesure you extend this for the length of your timeline (Figure 15).
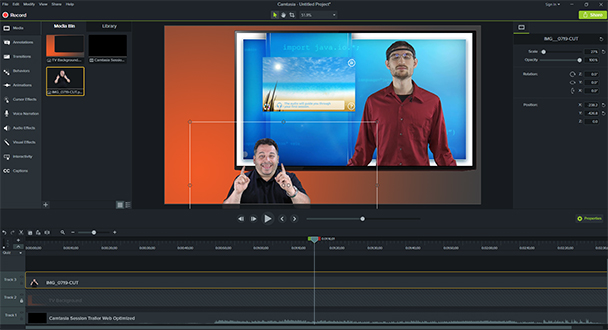
Figure 15:The instructor (in this case, me) added to the composite
Youcan actually add multiple “pictures-in-picture” in a single shot. Pretty cooleffect, don’t ya think?
[Inthe interest of full disclosure, the author was a beta tester for Camtasia 9and was compensated with a complimentary license.]
Come see Mark at DevLearn 2016 in Las Vegas. Hissession, Eight Things You Didn’t Know You Could Do with Camtasia, will delve further into Camtasia productiontechniques.