This column is meant for those who are learning how to use authoring tools to create simple e-Learning. I’ll offer tool-independent and tool-specific tips that can help you work better and faster.
PowerPoint slides in e-Learning courses often benefit from images that help the learner visualize and understand. I’ll explain more about this in the next few articles, but I want to start with making your use of text effective.
Cognitive load
Although text is necessary in e-Learning, relatively less text and relatively more visuals are often a good idea. But what about explaining the images? Actually, this topic is more complex than you might think.
Images (especially detailed images such as maps and screenshots) can increase cognitive load. Cognitive load is the degree of work imposed on working memory (which is extremely limited). When text and graphics overload working memory, it’s hard to learn and easy to become frustrated. So when you are using images, you need to take some steps to reduce unnecessary cognitive load.
Actually, some cognitive load helps learners engage. For example, an animation showing the stages of a tornado may require the student to stop and start the animation. This provides an opportunity to think, before proceeding, about what has changed and what is occurring at each stage. This type of cognitive load is actually needed for learning.
Managing the load
Here’s where it gets a bit more interesting for the designer and developer. When you add an explanation, whether in text or narration, learners must deal with two things at once — the image and the explanation. But this additional cognitive load is often necessary for the learner to understand the image. The solution is to make the explanation easy to handle.
Richard E. Mayer, Professor of Psychology at the University of California, did comprehensive research on multimedia and learning. His research provides two important principles for improving learning and reducing unnecessary cognitive load when explaining images on the screen. These two principles are:
|
We learn better from complex images or animations and narration, than from animation and on-screen text. |
|
We learn better from related text and images when related text and graphics are next to each other. |
If you are showing complex images on your slides and you need to explain them, Mayer’s principles tell us that it is better to explain them in narration rather than text (modality principle). This is because having to go back and forth between the image and the explanation is difficult.
But if a text explanation is used, the text should appear next to the image (spatial contiguity principle). I’m sure you have read a book or an article where the image appears on one page and the explanation is on another. Not good. I’ve even seen images presented on one slide, with the explanation on the next slide. It is hard to remember the image long enough to relate to the explanation on the next slide.
Use narrated explanations to go along with your images when possible. Make sure that any text explanations appear on the same slide as the image. You can also use text in two other ways to improve images on your PowerPoint slides.
Other ways to help
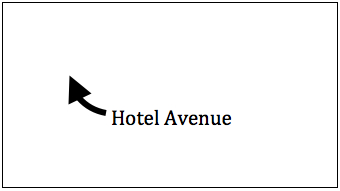
If you are explaining a complicated image (like a map or screenshot), it helps if the student knows where to focus on the screen. Annotations are often helpful, and they reduce unnecessary cognitive load. For example, consider placing an arrow with callout to point out the part of the image you are explaining, as shown in Figure 1. (Editor’s Note: There are no images in Figures 1 and 2 – they only illustrate the specific approaches Patti is suggesting.)

Figure 1. Use an arrow to show the learner where to look.
Rather than show one complex image and discuss the entire image in a tooooo loooong monologue on one slide, show the image on multiple slides. Use annotation to focus attention on different parts of the image in subsequent slides, as shown in Figure 2.

Figure 2. Use annotation to direct attention.
Use these techniques on your PowerPoint slides to make it easier and more fun for learners.
What’s next?
This time, I gave you some tips about what to put on your PowerPoint slides. In upcoming articles, I’ll share my thoughts about what not to put on those slides, the difference between good text and bad text, reducing the amount of text (also known as “word surgery”), about visualization (thinking like an artist), and how to pick the right images.


