Have you have heard of Lectora? If you’ve been developingeLearning, I bet you have. Lectora, the product line of the company Trivantis,has been around since 1999 and has had a sizable following since it launched. Ihave personally attended the last three Lectora conferences, spoken at the lasttwo, and have conversed with legions of Lectora fans all over the world.
Much as Microsoft decided to jump version numbers forWindows from v8 to v10, Trivantis made the decision to jump version numbers forLectora, its mainstay product, from v12 to v16.
Lectora is a product you install in Windows. Trivantis alsohas Lectora Online which you access and use in the cloud. It follows a morestandard version numbering approach. It is now in version 3.
Why I’m excited about Lectora 16
Yes! Responsive Design!
If you’ve been a regular reader of my reviews, you know Ihave written more than once that responsive design will be the only way to govery soon. Recall that responsive design means you create one lesson that, whenpublished, will adapt itself correctly to the device on which learners view it.This doesn’t mean just shrinking the desktop version to the screen size of acell phone. It means that you can decide what elements will be on screen foreach viewpoint. It’s how every commercial website is now or soon will beoperating, and it’s what everyone is coming to expect, no matter how they’reviewing a website, including your learning.
We have seen a few eLearning tools offer responsive design(such as Adobe Captivate and gomo learning), but most have not caught up yet.I’m happy to say that not only does Lectora offer responsive design optionsnow, but it does it right, offering a lot of options while making it as easy aspossible. Right away you’ll see the option on the splash screen (see Figure 1)when you start Lectora Inspire.
Figure 1: The Lectora 16 Splash Screen
When you choose to create a responsive design lesson, you’llsee five clickable options at the top of your stage (see Figure 2). From leftto right, they represent the Phone Portrait, the Tablet Portrait, the Desktop,the Tablet Landscape and the Phone Landscape viewports.
![]()
Figure 2: The Five Responsive Design Viewports
In keeping with industry standards, when you place an objecton the stage in the desktop view, you’ll be able to see it also in the otherviewports, automatically adjusted for size and position. Hierarchical rules arein place, so that if you move or resize the object:
- In the desktopview, it will automatically be adjusted in each of the other views.
- In the tabletlandscape view, it will also affect the cell landscape view.
- In the celllandscape view, it will not affect any other view.
- In the tabletportrait view, it will also affect thecell portrait view.
- In the cellportrait view, it will not affect any other view.
However, you can override hierarchy by explicitly moving theobject. For instance, if you move the object directly in the cell portraitview, and then subsequently move it in the tablet portrait view, the object inthe cell portrait view will remain where you left it. If you change your mind,you can right click and choose to resetoverrides. See Figure 3.
![]()
Figure 3: Reset Overrides
One very nice feature in Lectora ‘16 is that you can openany legacy lesson you’ve created before and indicate you want to make itresponsive. It will do its best to adjust each viewpoint correctly, but beprepared to customize each further.
Lectora now also has a new variable that is very handy forresponsive design projects, called CurrentView.It will let you know if the learner is currently in Desktop, PhonePortrait, PhoneLandscape, TabletPortrait, or TabletLandscapeview. This means you can, if you wish, show a message to the learner when theyturn their device to portrait mode that your lesson is best viewed in landscapemode. Another cool option is a new trigger called Device Rotation (see Figure 4), which you would use in conjunctionwith the CurrentView variable sothat you’ll know when the learner has rotated their device and give them theproper message (if you wish).

Figure 4: Device Rotation Action
Just so I’m clear, giving the learner a message that theyshould turn their device is just an option. There’s no reason you can’t makeeach viewpoint work exactly the way you wish. You can use the same variable andtrigger, for instance, to decide to display and have the learner perform anaction or not. You can truly customize each view. Nice!
Speaking of variables
I have created a few client projects in Lectora ‘12 andfound one feature a little odd, but usable. In most tools, if you want to showthe value of a variable on the screen, you can embed it in a text field usingsome designator to tell the tool that it is a variable and not just plain text,something like Welcome to the course,@@learner@@! When shown, that would automatically replace the variable learner with the name of the learner(assuming it had been entered earlier). In Lectora, it has been different.After placing a text object on the screen as a placeholder, you would need touse the Change Contents action toreplace all the text of that object with the contents of a variable. See Figure5.

Figure 5: TheChange Contents action
That wasn’t as limiting as it may sound. It meant only thatwe had to place text objects on the screen in such a way that the variable inone would line up with the other.
However, now there’s another way to show a variable on thescreen that doesn’t require replacing the whole text object. If you’re editinga text object, such as the one you see in Figure 6 where I’ve typed Today is (just simple text), you cannow insert a variable one of two ways. You can choose to enter a Variable inthe Add Action text properties, such as you see in Figure 6 (only a partialvariable list is shown). If you do, you’ll see the text object will now contain
Today is VAR(CurrentDate).
The learner will see today’s date, such as
Today is 1/28/2016.
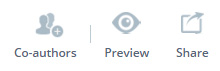
Figure 6: ANew Way to Insert Variables
Alternatively, you can type the VAR(var name) directly inyour text object if you wish. Be careful, though, because case matters. Forinstance, in this case, you want to make sure the C and the D are capitalized.
This also gives you more control over the Change Contents action, as you can nowdesignate, for instance, that the CurrentDate should be shown in a differentcolor, just by coloring the VAR(CurrentDate) differently.
Today is VAR(CurrentDate).
Today is 1/28/2016.
More updates
Other improvements have been made in Lectora 16:
- You can now have the Progress Bar move backwardas well as forward, useful for when you want to deduct points from a user’sprogress, or if you want have the learner choose from a set of options thatshould be reflected in the progress bar.
- You can now import titles into Lectora Online 3that you saved in Lectora 16 and vice versa.
- There are additional status conditions now inLectora 16, so you can check for six different options: Not Started, IsStarted, In Progress, Is Not In Progress, Is Completed, Is Not Completed.
Lectora Online 3
Lectora Online, the cloud-based version of Lectora, is nowmuch closer in design and features to Lectora Inspire. It too allows you tocreate responsive design projects. It looks and feels much like Lectora 16 withvery few exceptions.
So why use Lectora Online? There are two main reasons.
- It’s online! That means you are not limited tocreating your courses in Windows. You can open your browser on a Mac or othercomputer and start creating immediately.
- Online means you can have multiple authorscollaborating on a lesson. That’s much harder to do with the installed version.In Lectora Online, you can assign users and permissions to any part of yourlesson. Those you assign can check out that portion so that only they areworking on that portion and there won’t be any conflicts. Users can also addnotes, allowing your whole team to work together to meet deadlines. You caneven add assignments to team members and each member will see the assignmentsyou’ve given them.
Remember,you can exchange Lectora Online files with Lectora files easily now. That’s avery good thing.
Conclusions
While I’ve enjoyed many aspects of Lectora before, and nothave used Lectora Online because I couldn’t jump between the two easily, I’mhappy to see that I can now create responsive design projects and exchangefiles between the online and installed versions of Lectora. Responsive designis becoming increasingly important, and those companies that give developersthat option are definitely going to have an edge over those who don’t.
Try it out! There’s a 30-day trial you can usefor both products. I think you’ll really like all the power of Lectora tocreate the best instructional design possible.