


Making accessible courses in Storyline for your learners is something everyone should consider doing, whether you’re mandated to or not. Articulate Storyline 360 includes some great features that you should know about in order to make your work as a developer faster and easier.
Accessible learning involves a few things:
- Understanding the diverse needs of the audience
- Having a strategy to design and implement accessible training
- Building accessible courses with your software
In this article, we'll cover the accessible features in Storyline and how to use them.
Let’s start with closed captions
Early last year, Articulate Storyline 360 came out with the ability to import closed captions for narration and videos. It was pretty easy to create the SRT (SubRip Subtitle), VTT (Video Text Tracks), SBV (SubViewer Subtitle Format), or SUB (Subtitle) files from a third-party service such as YouTube, and get them into your course. Then, later in the year, Articulate improved the service by allowing you to create and edit closed captions right in the software! But that’s not all! Then they went a step further a few months later and added a great new feature called Text-to-Speech. You’ve probably heard some of those computerized voices before. But what does this have to do with closed captions, you ask? Well, with the text-to-speech application, you’re able to generate closed captions that automatically synchronize with text-to-speech narration. Then you can easily swap out the text-to-speech narration with your own professional narration (or your own voice) and with a few minor tweaks to timing, your closed captions are complete!
Here’s how:
- First, we’ll make sure that our narration script is finalized, and maybe even go ahead and order that professional narration (or beg your coworker to record some narration). Our best practice is to make sure the narration script is in the Notes section in Storyline (Figure 1).
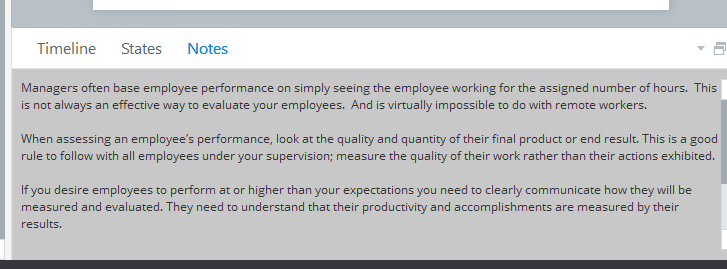
Figure 1: It’s a best practice to place the narration script in the Notes section in Storyline
- Next, we’ll go ahead and convert this text to speech by clicking Insert | Audio | Text-to-Speech. (Figure 2 ):
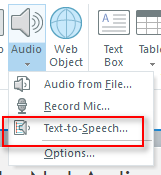
Figure 2: Choose Text-to-Speech from the Audio menu to convert the script
- From this window, we’ll copy our script from the slide notes, make sure Generate Closed Captions is checked, then click Insert (Figure 3).
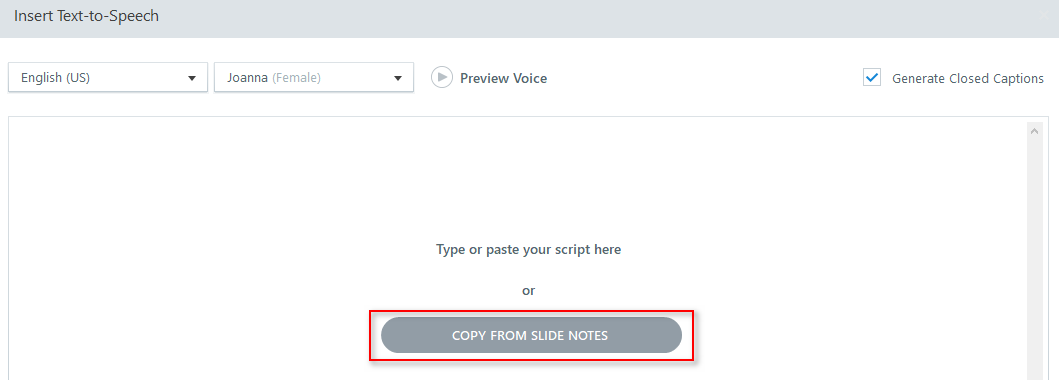
Figure 3: Check the Generate Closed Captions option to create the captions from the slide notes
- Once your professional narration arrives (or you’ve paid your coworker in Starbucks gift cards), you can swap out the audio. This can be done one of two ways:
- If you have the new narration in hand, with your audio selected, and on the Audio Tools Options tab, select Change Audio.
- If you need to record your own voice, with your audio selected, and on the Audio Tools Options tab, select Audio Editor (Figure 4).

Figure 4: The Audio Tools Options tab allows changing or editing the audio
- Your text to speech might be at a slightly different speed, so your last step is to edit the captions by clicking Edit Captions, on the Audio Tools Options tab (Figure 5).
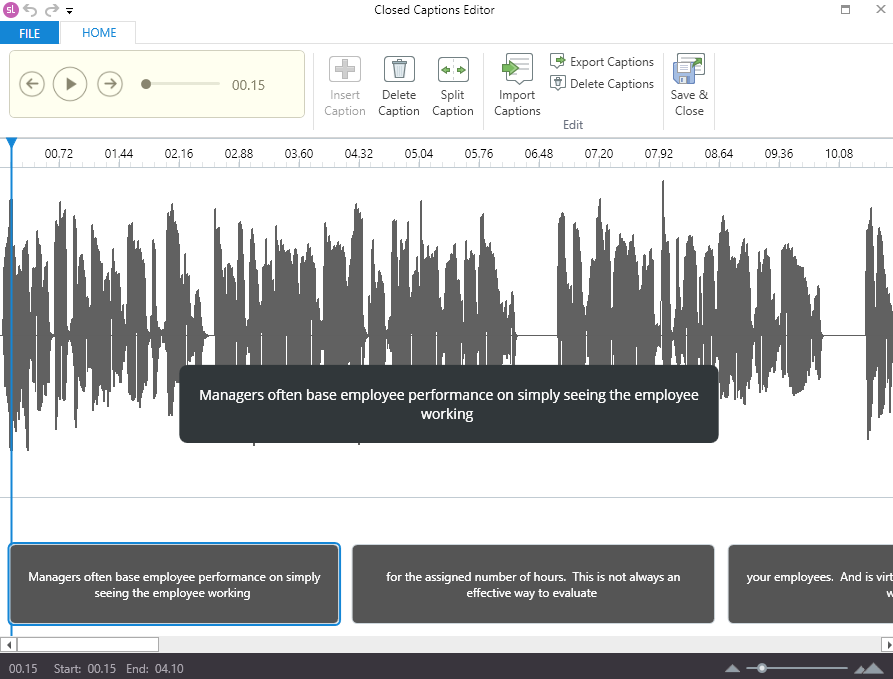
Figure 5: Adjust the speed of narration to match the captions by using the Closed Captions Editor
These steps are so much easier for us, rather than copying and pasting each sentence and timing it up ourselves from scratch!
Visual
Now let’s talk about another feature that makes our courses more accessible … screen readers. If you have never taken an eLearning course by using a JAWS (Job Access With Speech) screen reader, we recommend you give it a try to understand how JAWS reads your course out to a learner using it. It’s usually then that you realize how every single object in your course is being read by JAWS, and following these steps will help you minimize and change what JAWS reads out.
Alternate (Alt) text
Alt text is text read out by JAWS. For objects that you add to the screen that contain text, such as text boxes, shapes, buttons, captions, markers, etc. JAWS automatically reads the text inside the object. Therefore, the only reason you should add alt text to one of those items, is if you want JAWS to read something other than what text is already there. For example, you might want to add alt text to a button or marker to let the learner know how to activate the trigger for that object. That text might be something like “Press Enter to learn about resources for this course.”
Other items, such as pictures, shapes without text, etc. you might need to describe by writing the alt text, or remove them from being accessible altogether if they don’t provide any valuable learning experience. For example, take a look at the slide in Figure 6.
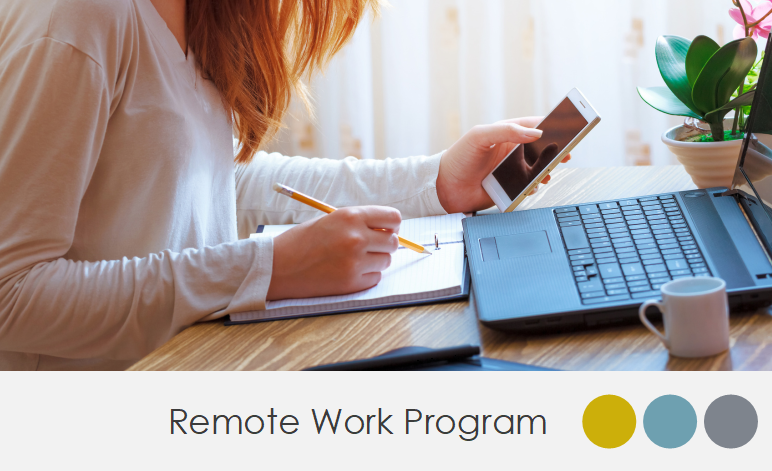
Figure 6: No alt text needed
There is probably no reason that JAWS needs to read out the top graphic, or the three circles in the bottom right corner. Here are the steps in editing the alt text for this slide in Storyline 2, Storyline 3, or Storyline 360:
- On the Home tab, select Tab Order. You’ll notice hat every item on the slide is visible here. However, you may notice that you can’t delete some items that you want to remove (Figure 7).
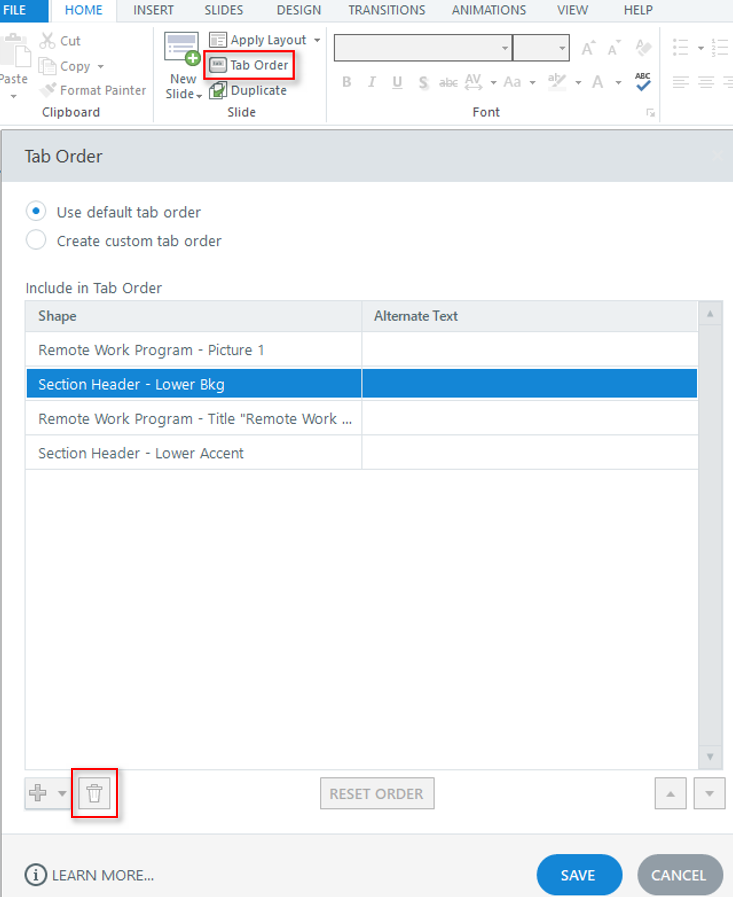
Figure 7: Changing the Tab Order
That’s because those are coming from the Slide Master, so it’s a good idea to remove those first.
- Open your Slide Master by selecting View | Slide Master. (You’ll have to close the Tab Order window first.) (Figure 8)
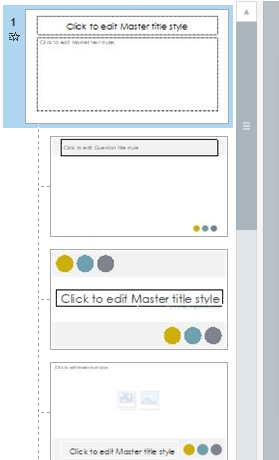
Figure 8 : First, remove the items from the Tab Order that don’t require alt txt.
You’ll want to remove all of the elements from the slide master that you don’t want your learner to navigate through with JAWS. Most of the time, it is everything with a few exceptions such as custom navigation.
- Right-click on any item on the main Slide Master then select Accessibility (or Size and Position | Accessibility in Storyline 2) (Figure 9).
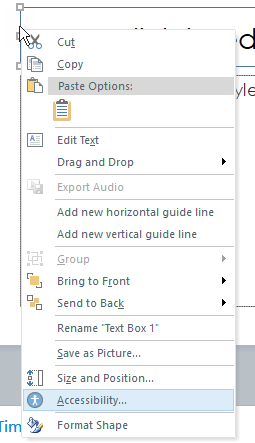
Figure 9: Open the main Slide Master accessibility with a right click
- This opens the Size and Position window as seen here (Figure 10):
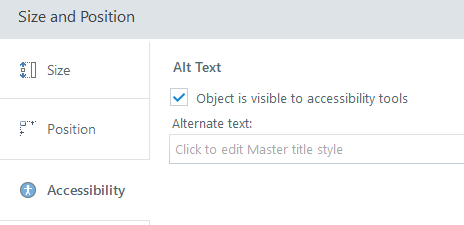
Figure 10: The Size and Position window determines which items in the slide master and master layout can be removed
We want to uncheck this box for virtually all items in each slide master and master layout. Here’s the shortcut…
- Keeping this window open, move it to the side a little bit so you can see your slide layout. Press Ctrl + A on your keyboard to select all of the items on your master.
- Uncheck the Alt Text object availability box. This now makes each item on this layout inaccessible to JAWS.
- Do this on each layout in your slide master. The awesome thing is that you don’t have to close the Size and Position window each time! It stays open while you navigate through all of your slide masters!
Now that we’ve finished editing our Slide Masters, it’s time to head back into the slide and edit each slide’s object. Here is that same slide’s Tab Order now that we’ve removed those background elements (Figure 11).

Figure 11: The slide Tab Order after removing the background elements
A little bit easier to work with!
Mobility
Almost every object you add to your Storyline timeline will be accessible. Buttons, shapes, captions, pictures, characters, markers, tables, dials, sliders, and more (Figure 12)!
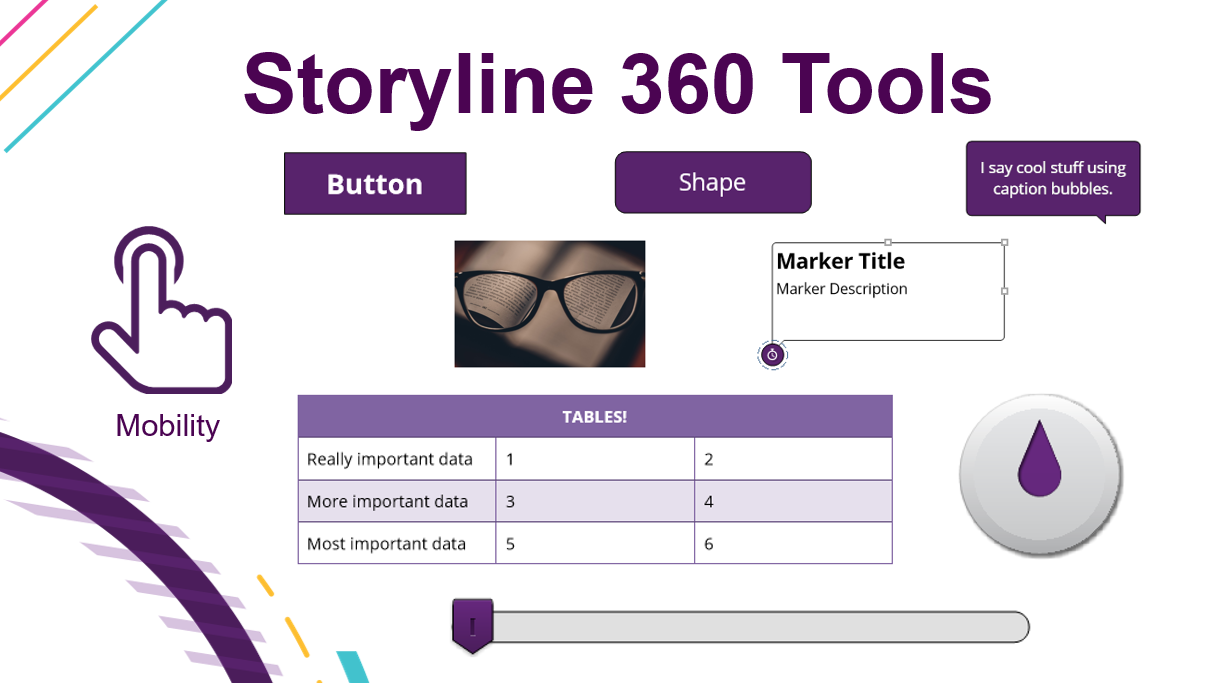
Figure 12: Almost every object added to your Storyline timeline will be accessible
Exceptions would include drag-and-drop interactions and questions, and hotspot interactions and questions. One of the ways we can “fake” a hotspot is by using a see-through shape instead of a hotspot. But here is a very important thing to know … there’s a right way, and a way that just won’t work for making an object see-through in Storyline.
If you use No Fill on the object’s shape fill, the object is see-through, but it’s not filled with anything so the learner can’t select it (Figure 13).
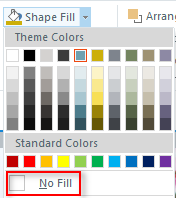
Figure 13: The learner cannot select objects with No Fill
However, if you right-click on the shape, the select Format Shape, you can adjust the object to 100% Transparency and the object will have a solid fill, but be completely see-through to the learner (Figure 14)!
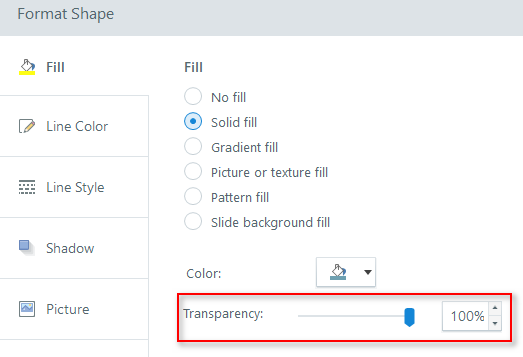
Figure 14 : Formatting an object or shape to 100% transparency allows the learner to select it
Check your work!
Now it’s time to test, test, test! Download the free version of JAWS to test out the accessibility of your course. Another valuable (FREE!) resource you could use while you’re testing your courses is the WebAIM website. It has all kinds of tools and checklists for you to use!
We hope that this helps you work faster and easier through some of the obstacles you might be facing in creating accessible courses in Storyline. Articulate also has a great eBook that you can download here that can give you some best practices in designing accessible eLearning!