
Templates are to instructions as blueprints are to architects, as recipes are to bakers, and as patterns are to knitters. The template is a set of instructions. While some instructional designers disparage the use of pre-designed templates—who hasn’t seen dozens of PowerPoint presentations or Storyline courses with the same color scheme or design—templates are a great starting point for designing professional, appealing eLearning courses.
The tips and resources described here can jump-start your design and development by making eLearning course presentations visually appealing without succumbing to that ubiquitous look and feel that comes from over-using templates. These tips are not relegated to use with one software package; they can be applied to PowerPoint, Storyline, Captivate, or Lectora. Most software comes packaged with templates.
The difference between templates and themes
To start, it’s important to know the difference between a template and a theme.
- A template contains sample content or placeholders (text, images, tables, video, audio). The template itself contains themes.
- Themes combine color combinations, font pairings (headings, titles, subtitles), and layouts. Graphic designers use the color wheel to select complimentary or monochromatic combinations of colors. For example, the template “Facet” in PowerPoint is a monochromatic color scheme with several hues of green. If you insert a table, the same gradients of green appear in the rows and columns. Likewise, if you create shapes or SmartArt, the color scheme retains the Facet theme.
Instead of using the default template as-is, follow the six tips suggested below.
1. Use a variant of the color scheme
 Figure 1: The Facet template uses a green color scheme as its default
The Facet template combines a green color palette and several different layouts and effects. Try changing the variant:
- In the Design ribbon, select Variant tab. Here, the design is the same but you can change the background to black. Or change the color scheme from green to blue or purple.
- You will notice as you insert a table or add a shape that the color scheme will match the variant. You can even change the color combination of the palette.
- Once you decide on the components of your theme, be sure to save the theme from the Design menu. In PowerPoint, the file extension is *.thmx and the theme will be saved in the path: C:…MicrosoftDocumentDesign Themes.

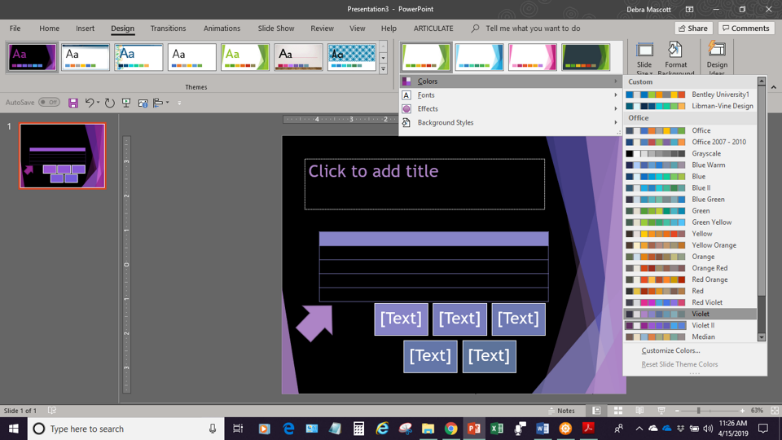 Figures 2 and 3: Changing the Variant attribute allows you to retain a template’s design elements while using a different color scheme.
2. Add your own images
Another trick is to insert common components, such as a company logo and a footer, into a template. This saves time and ensures that critical elements appear on every slide, in the same place.
After you insert the items, save the file as a Template. This is done in the File menu, Save As. Be sure to choose the *.potx file type, which saves the file as a template. The path of the templates is: C:..MicrosoftDocumentCustom Templates.
3. Explore a new project using Content Library 360
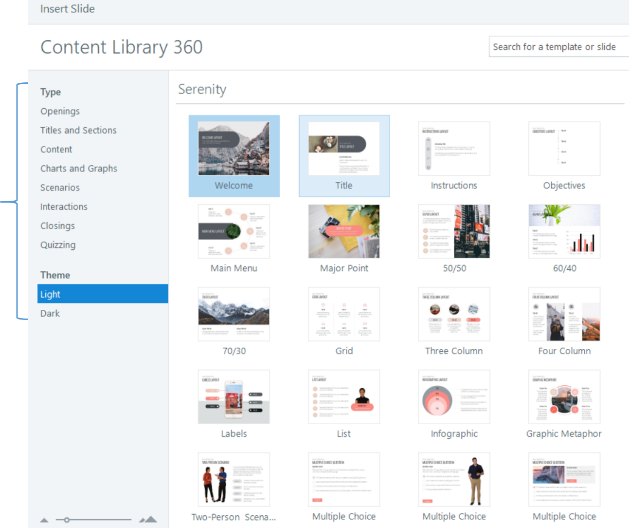
Figure 4: Content libraries offer templates and other resources
Starting a project from scratch is challenging and can entail hours spent designing layouts and color schemes. Instead, try exploring a new project by peeking into the Content Library.
With Articulate Storyline 360, the Content Library contains not only photos, illustrations, and icons, it also offers a wide variety of templates, divided into categories such as openings, closings, scenarios, and quizzes. You can look at different designs as well as light or dark backgrounds. Even if you do not select Velocity, Serenity, or Vigor, you can see how the designs are built for clarity and consistency.
To explore a project using the Content Library, select New Slide from the Home menu and choose Content Library 360. Thumbnails of resources, as in Figure 4, will display. If you are looking for ideas for quizzes or interactions, dig into the many possibilities here.
Once you select a category and a design, the slide will display in Storyline’s Story View. Click on the slide to see how the slide was created. The slide may contain several layers, states, or triggers—interactive features for learners—that have already been built. You can learn a lot about how to design an interactivity or quiz by looking at what has already been created. If you don’t want to use the design’s color scheme or layout, you can apply your own template. What will remain are the components within the slide.
4. Using slide masters and layouts
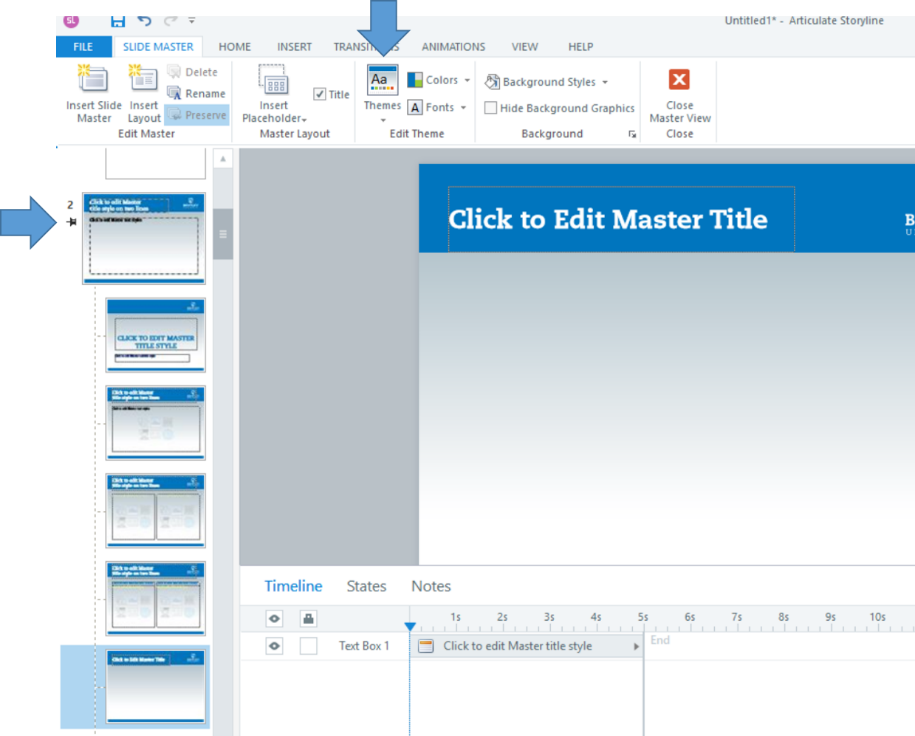 Figure 5: Editing slide masters can save work and improve consistency
Slide masters in Storyline work much as they do in PowerPoint. These offer layout options that contain text and media objects, as well as placeholders for images and video. They can be edited slide by slide.
Slide masters save time and improve design consistency. The master slides designate the size of the text, the heading size, the color scheme, and the layout of the slides. The master slides can contain placeholders for text, images, and shapes to ensure consistency as you create multiple slides or pages for your eLearning course.
To work with a slide master, select View, Slide Master. Each master slide can have a different layout, and, when creating your project, you can choose which master to use as the basis for each slide.
After you’ve created a set of masters for your project, save the project as a Template. From the File menu, select Save as. The type of file is a template (*.storytemplate).
5. Easily import content
One of Articulate Storyline’s best features is the seamless task of importing PowerPoint content. It’s easy to import dozens of slides from PowerPoint, and the slides will automatically convert to Storyline. When doing this, it’s best to decide whether you intend to bring in the template and master slides along with the content. If you import the content (bulleted text, images, tables etc.) as well as the master slides, your Storyline slides will resemble the PowerPoint deck. However, if you design your course in Storyline, then it’s preferable to import only the content.
If the PowerPoint deck uses a template design you do not intend to use in your course, it’s a good idea to change the PowerPoint deck to the plain “vanilla” default master slides prior to importing it into Storyline. Otherwise, the content plus the template will populate your course and you will have Master Slides you do not intend to use. After you import the slides, apply your design template in Storyline.
6. Use template resources for inspiration
Many websites for authoring software, as well as PowerPoint, offer templates (or subscriptions) for free or for a reasonable cost. Some great resources are:
- Articulate Storyline eLearning heroes
- eLearning Brothers — resources for Storyline, Lectora, Captivate, iSpring, PowerPoint
- Technomatix
- SlideShop
- Envato Elements
- Faster Course
One of the best investments you can make is exploring different templates, layouts, and themes before you design a course. Inspiration can come from many sources. Subscribing to various template companies and browsing their designs can inspire your creativity. It’s simple enough to modify the template design—or just use them as a source of ideas. Templates are like a recipe—a set of instructions. You can always change the ingredients to make it your own.