

Sometimes, deep beneath the sea, there are hidden treasures. Your eLearning authoring tool may be hiding some features that, like a hidden treasure, can delight an audience. In this example, we will use Articulate Storyline to reveal some of these features, but these tips can apply to any authoring tool that uses a timeline.
Let’s explore three tricks that can make your eLearning more interactive by varying when an object appears.
Varying the timing of objects on timeline
All objects—text, image, audio, video, or any other object—are displayed on a static slide at the beginning of their timeline. However, you may want to delay or change the display of an object.
What if you wish to display the object at 4 seconds? There are three tricks that can accomplish this:
- Move an object on the timeline
- Cue an object to appear by using a trigger
- Start an object in a “hidden” state
Move an object on the timeline
Let’s start with the timeline itself. There are five objects on the slide in Figure 1. The entire duration of the timeline is 21 seconds.
Change when an object appears
- The hidden treasures and ocean (5) is an illustration which serves as the background. To prevent it from moving as you add other objects, it’s nice to lock the object in place. Click the lock for this item to prevent the background from moving.
- The text “Hidden Treasures” is the heading (4); the goldfish (2) and the bluefish (3) are both *.png objects. The text-to-speech audio (1) is at the top.
- What if you want the bluefish to appear after 4 seconds? You can move the bluefish.png (3) object along the timeline to “4s” or 4 seconds. The bluefish will stay on the slide for the rest of the time that slide is visible (the remaining 17 seconds).
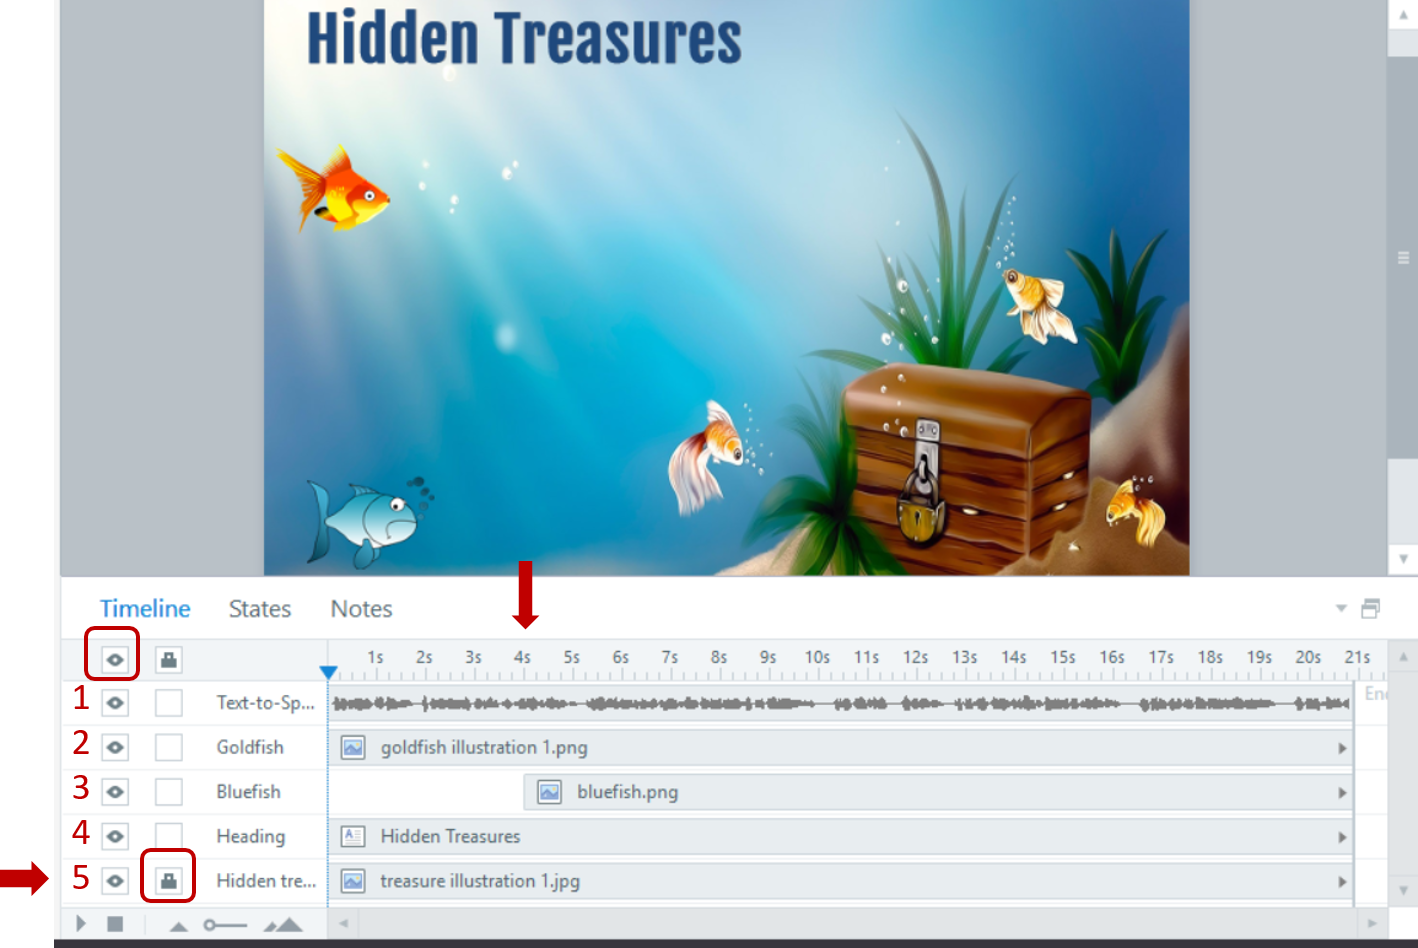 Figure 1: The hidden treasures timeline shows multiple objects
Make an object disappear
What if you want the bluefish to disappear at 11 seconds?
- The bluefish now appears at 4 seconds and remains visible. Let’s reduce it so it appears at 4 seconds and disappears at 11 seconds.
- Click and drag the end (right side) of the object from 21 to 11 seconds. The cursor must be a double-headed white arrow to change the size of the object. (The black arrow changes the duration of the slide).
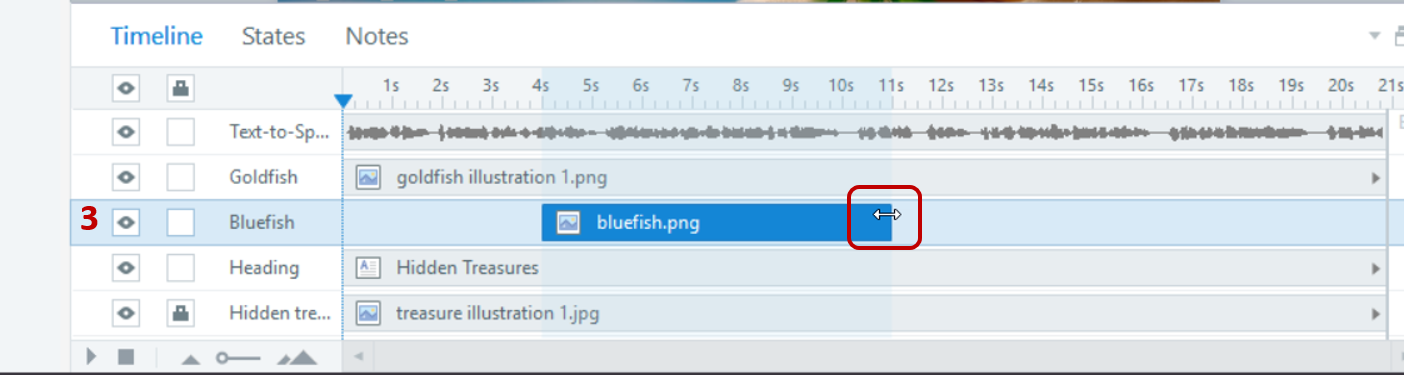 Figure 2: Timeline with bluefish object appearing at 4 seconds and disappearing at 11 seconds
Cue an object to appear by using a trigger
What if you want the bluefish to disappear precisely when the narrator makes a point? Or to appear at a specific point in the narration?
You can set a cue point within the timeline to synchronize the object with the narration. Using cue points is specific.
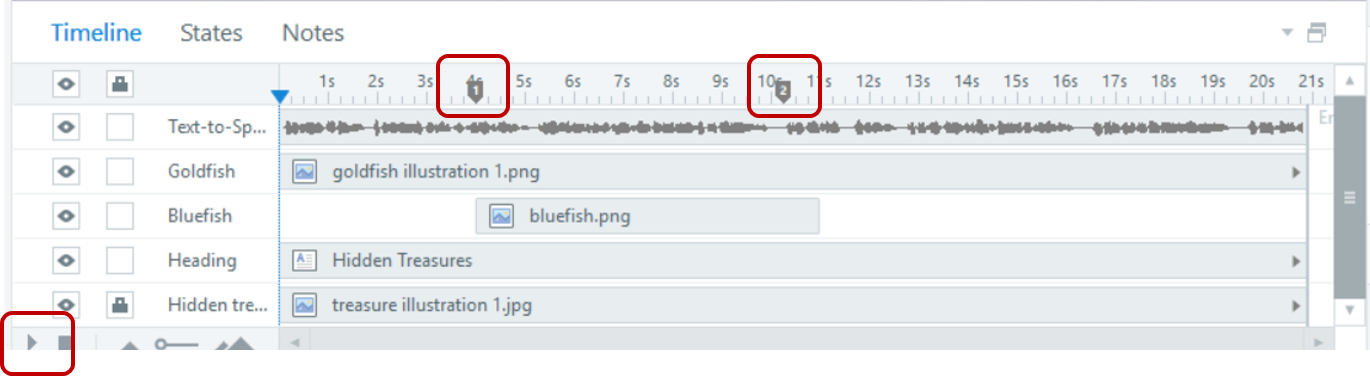 Figure 3: The timeline shows cue points on audio text-to-speech
- Play the audio using the timeline play button.
- Press the letter C (for cue) on the keyboard at the precise moment you would like the bluefish to appear. This sets up the exact timing of the bluefish.
- Create two triggers: Cue #1 to state normal at 5.5 seconds. Cue #2 to hide at 10.25 seconds.
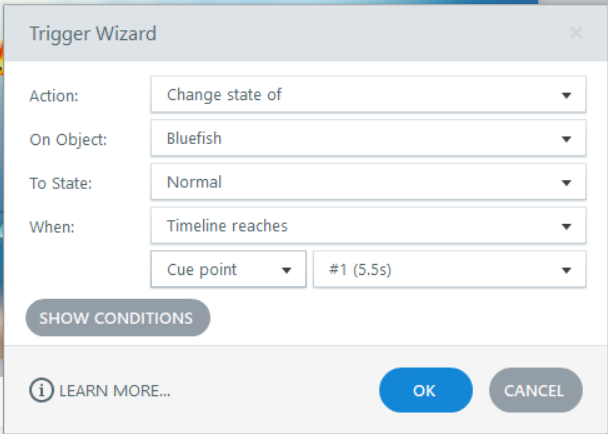
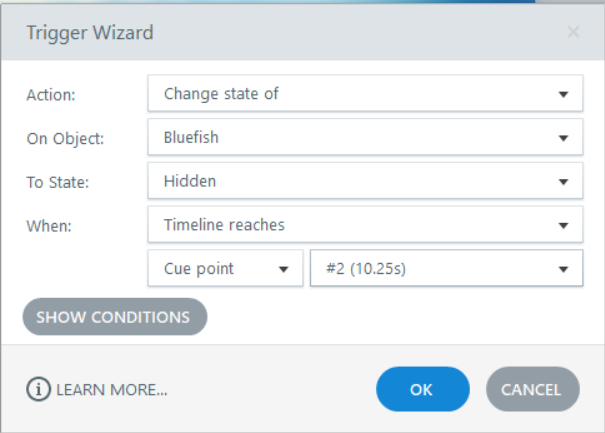
Figures 4 and 5: The Trigger Wizard allows you to determine what happens at each cue point. In this case, the bluefish appears at cue #1 and disappears at cue #2.
Start an object in a “hidden” state
Lastly, what if you want the learner to click on the bluefish, but you don’t want to display it until 4 seconds into the slide?
You can set the initial state of the bluefish to hidden. That way, the bluefish is there (and can be selected) at the beginning of the timeline, but learners cannot see it.
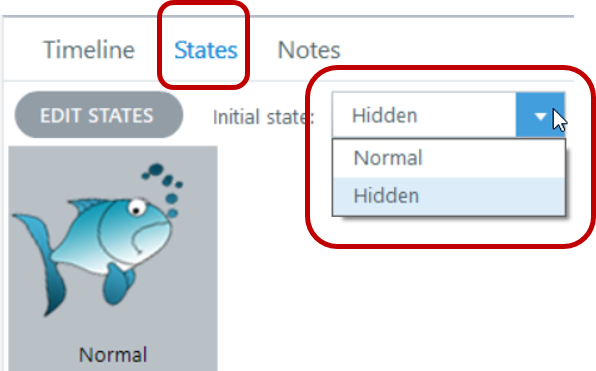
Figure 6: Set the initial state of the bluefish object to “hidden”
To turn the bluefish to a normal state, create a trigger to turn it to normal, as you did in the previous example:
From the trigger panel, click new trigger. Set it as follows (see Figure 4):
- Action: Change the state of
- On Object: Bluefish
- To State: Normal
- When: Timeline reaches cue point #1
These are just some of the hidden treasures that allow you more control over your timeline and objects.
Learn to use your authoring tool
To find out more about how your L&D peers use authoring tools, read Authoring Tools 2019, a free research report from The eLearning Guild. Advance to the next level with a hands-on workshop: DevLearn 2019 Conference & Expo offers daylong workshops on using Storyline and Captivate—for both beginning and experienced users.