


(Editor’s note: This article will not display properly on a smartphone, and possibly not on a small tablet. We recommend viewing it on a desktop system, preferably one with two displays.)
In my previous article, I explained the steps you need to take to send an xAPI statement. By way of quick review, those steps are:
- Define a variable that holds the URL address of the learning record store (LRS) and the username and password to authenticate
- Tell the browser to use that variable for the LRS
- Create a variable and define the xAPI statement
- Send the statement
In this article, we’ll look at how to start programmatically adding meaningful data to those statements using data available from your page or LMS. Just like the process of sending a statement, building one is pretty easy, once you learn a couple of simple programming concepts and plan out what you need and when you’ll need it.
But I’m not a developer or programmer!
Knowing how to build statements is of immense benefit to instructional designers too! Keep in mind that the current versions of some of the popular rapid-development tools only really send xAPI statements for the traditionally SCORM-like events (launch, suspend, completion, pass, fail, etc.). So if you want to make the most of xAPI, you’ll need to add some custom code to your products. But even before that, knowing what information you’ll need and where to find it will help you make smart design decisions that will allow your online courseware to make sure the data is there to do whatever you need it to do.
(Editor’s note: We recommend that readers open another copy of this article on a new browser tab, or display another copy of this article on a second monitor if one is available. You will be looking back and forth from Anthony’s text to his code listings.)
A couple of things you should know
The first thing you should understand is that most of the xAPI code you’ll ever experience (no pun intended) will be written in JavaScript. Whether you write the code yourself or the code is the product of a rapid development tool, it will be in JavaScript. Which is a good thing. Because the second thing you need to know is how your browser, and the Internet at large, views code and script. Let’s take a look at this statement:
var statement = {
             "actor": {
                "mbox": "mailto:Tester@example.com",
                "name": "Your Name Here",
                "objectType": "Agent"
            },

            "verb": {
                "id": "http://example.com/xapi/interacted",
                "display": {"en-US": "interacted"}
            },

            "object": {
                "id": "http://example.com/button_example",
                "definition": {
                    "name": {"en-US": "Button example"},
                    "description": {"en-US": "Example xAPI Button"}
                },
                "objectType": "Activity"
            }
}; //end statement definition
That’s a nicely formatted statement. It’s well indented to help you see where each of the components (Actor, Verb, and Object) are defined. It’s easy to read. And, it’s just a pleasure to look at. It’s also all for you, the human. The fact is, the computer sees the above code like this:
Var
statement={"actor"{"mbox":"mailto:Tester@example.com","name":
"YourNameHere","objectType":"Agent"},"verb":{"id":"http://
example.com/xapi/interacted","display":{"en-US":
"interacted"}},"object":{"id":"http://
example.com/button_example","definition":{"name":{"
en-US":"Buttonexample"},"description":{"
en-US":"ExamplexAPIButton"}},"objectType":"Activity"}};//endstatementdefinition
It may not seem like it, but that’s a good thing. xAPI statements are anything but precious or fragile. Yes, they must conform to certain standards. But they are treated much like any other string or JavaScript object you might have to manage. You have handy tools like the ADL xAPI wrapper you met in the first article to help you. So you can make all kinds of changes to your statements. You won’t hurt anything. You won’t break the computer. You won’t break the Internet. So yes, the first example looks somewhat imposing at first. But the fact is that it’s all for your viewing pleasure. xAPI statements are a pretty hardy bunch.
Also, JavaScript string variables are defined by using double quotes. For example: “Hello World!” is a string. The best part about them is that they can very literally just get added together to form bigger, more complex strings. Try this: Open the JavaScript console for your browser (In Chrome you open the console by selecting View > More Tools > Developer Tools > JavaScript Console). In the console window, type the following, then hit return or enter.
“Hello ” + “world!”
The console will print “Hello world!”, or “Helloworld!” if you forgot the space after “Hello.” (See Figure 1.)
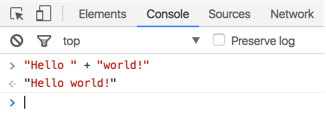
Figure 1: The classic “Hello world!” statement in a console window
This is a vital thing to know, as we’ll use this a couple of times in the below examples. Again, the Internet is really robust. You’re not going to break anything you can’t easily fix! And it is generally really easy to fix the things we’ll be looking at below if you make a typo or something.
So, with these things in mind, let’s break out some code.
Starting with a basic example
Below is a complete, functional webpage to show a very simple statement when a user clicks on the button.
<!doctype html>
<head>
      <!-- Includes for ADL's xAPI Wrapper -->
    <!-- Download the files from: -->
    <!-- https://github.com/adlnet/xAPIWrapper -->
    <script type="text/javascript" src="./js/cryptojs_v3.1.2.js"></script>
    <script type="text/javascript" src="./js/xapiwrapper.js"></script>
    <!------------------------------------->

    <script>
    function send_statement(){
        var conf = {
              "endpoint" : "https://lrs.adlnet.gov/xapi/",
              "auth" : "Basic " + toBase64("xapi-tools:xapi-tools")
              };

        ADL.XAPIWrapper.changeConfig(conf);

        //define the xapi statement being sent
        var statement = {
            "actor": {
                "mbox": "mailto:Tester@example.com",
                "name": "Your Name Here",
                "objectType": "Agent"
            },
            "verb": {
                "id": "http://example.com/xapi/interacted",
                "display": {"en-US": "interacted"}
            },
            "object": {
                "id": "http://example.com/button_example",
                "definition": {
                    "name": {"en-US": "Button example"},
                    "description": {"en-US": "Example xAPI Button"}
                },
                "objectType": "Activity"
            }
        }; //end statement definition

        // Dispatch the statement to the LRS
        var result = ADL.XAPIWrapper.sendStatement(statement);
        }
    </script>

</head>

<body>
    <button type="button" onclick="send_statement()">Send Statements</button>
</body>
</html>
In the example you just saw, the statement says … very little of use. It says that an anonymous user interacted with a button. This is good if you want to know how many times the button has been clicked. But that’s it. It won’t tell you how many different people have clicked the button, or even who has clicked the button. It just says that the button got clicked. But you can easily add the functionality to see who gave the button a click.
The Actor, in this statement, would describe who clicked the button. And that person is defined in the above example as:
"actor": {
    "mbox": "mailto:Tester@example.com",
    "name": "Your Name Here",
    "objectType": "Agent"
},
The Actor ID is defined, in this case, by the line
"mbox": "mailto:Tester@example.com"
The mbox key tells the LRS we are using an email address as the Actor ID. And if you look closely, you’ll notice that the email address is actually a string. So we can edit this pretty easily. The important bit that must be there is the “mailto:” piece. And, as we saw before, if we have the user’s email address, we can simply add it to “mailto:” and we’ll have our Actor ID. So we need the user’s email address.
There are a few ways to do this. One example is to simply ask them. So we’ll add a line to the code so it reads like this:
<script>
    var email = prompt("What is your email address?")
    var conf = {
          "endpoint" : "https://lrs.adlnet.gov/xapi/",
          "auth" : "Basic " + toBase64("xapi-tools:xapi-tools")
        };

    ADL.XAPIWrapper.changeConfig(conf);
</script>
Now, when the page loads, a pop-up will ask the user for his or her email address. It will capture the user’s email address as a string. And, as you’ll recall from above, you can just add two strings together to make a larger one! So we’ll use the email variable to define the Actor like this:
"actor": {
        "mbox": "mailto:” + email,
        "name": "Your Name Here",
        "objectType": "Agent"
},
It’s that easy. Well … kind of. There is a problem. The learning record store (LRS) won’t check to make sure the email address is completely valid. But it will reject the statement if the email address is not correctly formatted (username@domain.TLD). What if the user enters something like “I don’t wanna”? The statement will get rejected. But there is another way to identify your Actor. You can use the username and site URL for your LMS, LRS, or hosting site. In this case, the Actor would be defined like this:
"actor": {
    "account": {
        "homePage": "http://www.example.com",
        "name": email
        },
    "objectType": "Agent"
},
Again, we’re just using the string we collected from the prompt() pop-up, but now, instead of requiring an actual email address, it’s using the username at your LMS. This is a fantastic way to do it, too. Because xAPI can also be used with SCORM content. For example, if you are using the Rustici SCORM driver for your SCORM content, you could replace the line we added above with this one:
<script>
    var email = SCORM_GetStudentID();
    var conf = {
          "endpoint" : "https://lrs.adlnet.gov/xapi/",
          "auth" : "Basic " + toBase64("xapi-tools:xapi-tools")
        };

    ADL.XAPIWrapper.changeConfig(conf);
</script>
That will pull the username, or user ID, for the student from the LMS. Then, for the host, just list the URL of your LMS.
Capturing video interactions
Let’s take a look at another example. This time, capturing activities from a page-serving video. This time, we’ll look at a web page that plays the open-source video Big Buck Bunny. The page will prompt the user for an email address and build the Actor based on the email address entered. It will also build the Verb based on what the user does (clicks play, clicks pause, or the video completes).
Note: For this example, I’ll use straight HTML5 video using the <video> tag. But the concepts easily apply to any player such as JWPlayer.
<!doctype html>
<head>
      <meta charset="utf-8">
      <meta http-equiv="X-UA-Compatible" content="IE=edge,chrome=1">

      <title>xAPI Video Sample</title>

    <!-- The video used is Big Buck Bunny under Creative commons 3.0.  -->
    <!-- You can find the movie here: -->
    <!-- https://peach.blender.org/download/ -->

    <!-- Includes for ADL's xAPI Wrapper -->
    <!-- Download the files from: -->
    <!-- https://github.com/adlnet/xAPIWrapper -->
    <script type="text/javascript" src="./js/cryptojs_v3.1.2.js"></script>
    <script type="text/javascript" src="./js/xapiwrapper.js"></script>

    <script>
        // this adds the pop-up to ask for the user's name.
        We'll build the ACTOR definition
        // with this first name
      var email = prompt("What is your email address?");

        // Set the URL and user credentials for the LRS
        var conf = {
        "endpoint" : "https://lrs.adlnet.gov/xapi/",
            "auth" : "Basic " + toBase64("xapi-tools:xapi-tools")
        };

        // Tell the xAPI driver to use these creds
        ADL.XAPIWrapper.changeConfig(conf);

        // This function will programmatically build the statement using variables
        function sendxAPIStatement(userName, action) {
            var statement = {
                "actor": {
                    "account": {
                        "homePage": "http://www.example.com",
                        "name": userName
                    },
                    "objectType": "Agent"
                },
                "verb": {
                    "id": "http://example.com/expapi/verbs/video/" + action,
                    "display": { "en-US": action }
                },
                "object": {
                    "id": "http://example.com/bigbuckbunnyvid.html",
                    "definition": {
                        "name": { "en-US": "Big Buck Bunny Video" }
                    },
                    "objectType": "Activity"
                }
            };
            ADL.XAPIWrapper.sendStatement(statement, function(){});
            // adding an empty function() at the end of sendStatement tells it to fire asynchronousely
      };

    </script>

    <!-- -------------------------------- -->

</head>

<body>
    <div align="center">
        A quick example of using xAPI to track jwplayer events.
        <br/><br/>
    </div>

    <!-- This sets the HTML video player provided by the browser -->
    <div align="center">
        <video id="mediaPlayer" width="720" controls>
            <source src="big_buck_bunny.mp4" type="video/mp4">
            Your browser does not support HTML5 video.
        </video>
    </div>

    <script>

        // this sets up the Variable "Vid" to point to the video player
        // so we can interact with it.
        var vid = document.getElementById("mediaPlayer");

        // When the user hits Play...
             vid.onplay = function() {
        sendxAPIStatement(email, "Play")
        }; // End onPlay()

        // When the user hits Pause...
             vid.onpause = function() {
        sendxAPIStatement(email, "Pause")
        }; // End onPause()

        // When the video completes
             vid.onended = function() {
        sendxAPIStatement(email, "completed")
        }; // End onEnded()

    </script>

    <!—  everything between <p> and </p> is all one line - no line breaks —>
    <p><a href="https://peach.blender.org/about/"><img style="float: left;" title="cc-by" src="https://peach.blender.org/wp-content/uploads/cc-by.jpg" alt="" width="100" height="35" /></a></p>

</body>
</html>
In this latest example, we modify Actor and Verb in the statement using the methods we looked at in the earlier examples. While defining the Actor we simply use the variable as the value for the Name key.
"actor": {
       "account": {
                "homePage": "http://www.example.com",
                "name": userName
       },
       "objectType": "Agent"
},
In the Verb definition, we use both methods, defining the verb URL by combining the base URL with the string variable action. Then we use that same variable as the value in the key pair for the display value:
"verb": {
       "id": "http://example.com/expapi/verbs/video/" + action,
       "display": { "en-US": action }
},
In conclusion
You can use xAPI to track just about anything you can imagine. But you have to be able to build the statements in order to send them. And while the above is far from a thorough review of all the ways you can build statements programmatically, it should give you enough to help you get started. As you can see, as it is with most things, the programming is not all that difficult, and is very straightforward. The hardest part will be in designing your activities, making sure you build them so that you can get the data you need at the point that you’ll want to send your statements. Once you’ve got that covered, the rest is cake.
In the next article, we’ll look deeper into tracking video consumption. We’ll also look at tracking test answers to start correlating test results to video production, so we can see if those videos are getting the job done!