


Many, if not most, eLearning projects start out as live instructor-led lessons. Subject matter experts are asked to hold regular sessions in a company meeting room or online to train others in the organization on their area of expertise. Eventually, someone within the organization decides to convert the classroom training into eLearning.
Of course, while eLearning has many advantages over classroom-based training, it also suffers from a few disadvantages, at least in most eLearning courses that have been created until now. One of the biggest disadvantages is the lack of social networking. Whereas you can ask an instructor questions while sitting in a classroom, usually you do not have someone to whom you can turn and ask those questions when taking an eLearning course.
The solution in many cases is to incorporate social networking into your eLearning. You can allow learners to contact one person or many, using email, Twitter, Facebook, Google+, and other social networks. It may not give them the immediate feedback that asking a live instructor usually does, but it’s surprising how quickly the answers can come when people tweet or post a question elsewhere.
In addition, social networks can help employees learn to work together on teams. You can give challenges to a group of employees; the team members can decide how to divide up the work and perhaps make a record of each member’s contributions.
Trivantis Lectora
Among the principal eLearning tools (those that take up most of the market share), Trivantis Lectora is the only one that has social networking features built in. However, it’s not difficult to add a social network link or to have a live social network appear in a web window within your course.
Both the desktop version of Lectora and Lectora Online include options for inserting social media links. They both include almost identical options, the only exception being that Lectora Desktop (Figure 1) includes Facepile, which Lectora Online (Figure 2) does not.
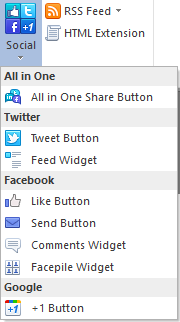
Figure 1: Lectora Desktop social network options
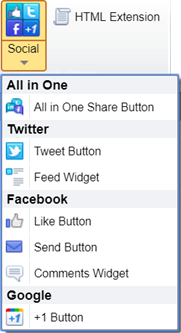
Figure 2: Lectora Online social network options
Note that the first option in each is the All in One Share Button. You can see what it looks like in the desktop version (Figure 3) and the online version (Figure 4).
![]()
Figure 3: The All in One Share in Lectora Desktop
![]()
Figure 4: The All in One Share in Lectora Online
You can also insert individual buttons and widgets, as you can see in Figure 5.
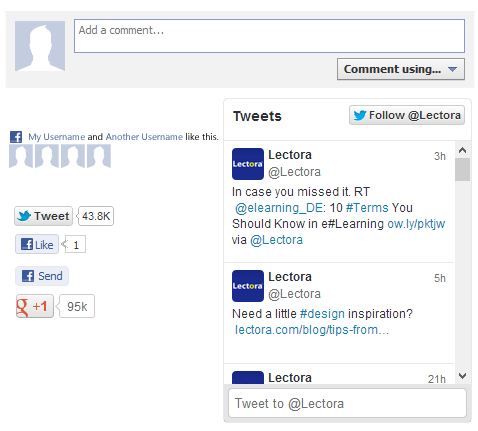
Figure 5: Individual social networking options in Lectora
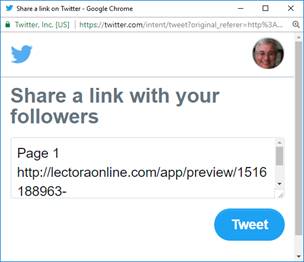
Figure 6: The tweet option in Lectora
You can set the properties for each of the buttons and widgets. When published to a web server, or when using Lectora Online, you can see the result of the buttons and widgets above.
Clicking ![]() will open a window in which the current link will populate the tweet box.
Learners can change or add the tweet before sending it. For instance, for team
members or specific topics, they can add a hashtag. See Figure 6.
will open a window in which the current link will populate the tweet box.
Learners can change or add the tweet before sending it. For instance, for team
members or specific topics, they can add a hashtag. See Figure 6.
Similarly, you can:
- Give the current link a Facebook “like”
- Send the link to one or more friends on Facebook
- Post a message to your Facebook page
- Post the link to Google+
- Show a Twitter feed of your choosing
Clicking ![]() leads to many more options. First you see the drop-down list in Figure 7.
leads to many more options. First you see the drop-down list in Figure 7.
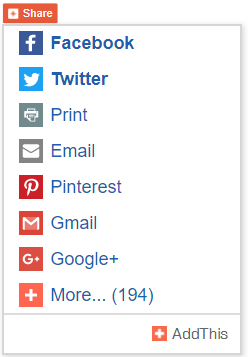
Figure 7: The Share drop-down list
If you click More (Figure 7), a new page opens with 194 different options. (Impressive!) See Figure 8.
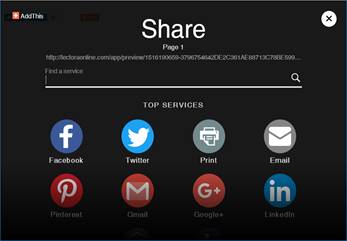
Figure 8: 194 social networks in Lectora
Other authoring tools
Most authoring tools offer a feature that lets you insert a live web window in your eLearning. Lectora calls it a web window. It’s called a web object in Articulate Storyline, Articulate Presenter, Adobe Captivate (under Objects > Web), Adobe Presenter, and iSpring Suite. Its name may vary in other authoring tools.
In most authoring tools, you have several options aside from providing the link to show. Yours may allow you to:
- Use a URL or an embed code
- Resize the window to any size you need
- Have the website show automatically, or show when clicked
- Let learners see browser controls and/or the address bar, or neither
- Display the site embedded in the current window, in a separate window, or in a separate tab
- Show a border around the window or not
- Show scrollbars or not
As a web object allows you to point to any site on the internet, you can set them up to link to a set of resources, to company websites, and to any other website that could be useful.
What’s more, you can use it to point to any social network, including a team site, a forum, Twitter, Facebook, and any other useful network. The social network can be stored on your local intranet or be public. It is up to you. Use your imagination and allow learners to work on teams, ask questions, and work in other ways that help them collaborate with others.
Figure 9 shows a web object embedded in a Captivate lesson that shows the Twitter feed from the eLearning Guild’s Learning Solutions Twitter account. All I did was to go to the Twitter page, choose the Embed This Profile option, then choose the Embedded Timeline option. It provided the link, which I then copied into the web object in Captivate, and I was done. This is useful for letting learners see what others may have tweeted about a particular topic. To have them send their own tweets, you’ll want to have the web window open the main Twitter page and have them log in to their own account.
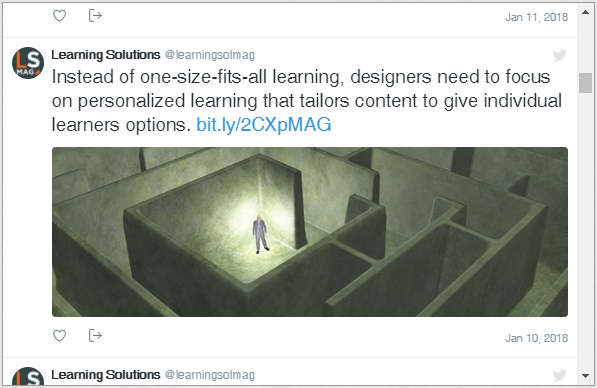
Figure 9: A live web object in an eLearning course
Have you implemented a social networking solution in your eLearning? Do you have an idea that you’d like to try? Why not share it in the Comments box below?