


Most eLearning projects involve the creation of storyboards before development work begins. Since I have worked as an eLearning designer and developer for many years, I have seen several attempts to create a commercially available tool that would allow us to create storyboards more easily and completely. They always tend to fall short in one area or another. The basic problem is that eLearning projects can vary so much that any attempt to create a tool that purports to assist instructional designers can eventually feel constraining in one area or another.
For this reason, most designers still tend to use Microsoft Word or PowerPoint to create their storyboards. Storyboards include detailed instructions to the developer, artist, and media developers for each slide, page, or portion of an eLearning project—along with narration scripts, descriptions of interactivity, and possibly a branching diagram and more. The basic idea is that once the key stakeholders review and sign off on the storyboards after any required changes have been included, each eLearning team member now has a clear and complete understanding of what they need to create.
Enter Xunto. To call this a storyboarding tool does not do Xunto justice because it does much more than create a storyboard document. I think of it more as an eLearning project management tool, with storyboarding as its central focus. The tool’s launch was at the eLearning Guild's DevLearn 2019 conference, so it’s very new.
How Xunto works
Once you create an account, you’ll see the basic steps in order in the tool menu (see Figure 1).

Figure 1: The Xunto toolbar with its three steps
The first step involves setting up a Space (short for Workspace). I’ve named mine Joe in Figure 1. You can also invite other team members to your Space for collaboration purposes. Each member of a Space will have one of the following roles: Administrator, Manager, Teammate, Consultant, or Guest. As is common in these cases, what each team member can do depends on their assigned role. The Guest role is reserved for Customer and SME project roles (see below), and are free in the system.
The second step is to set up your Project, which I called Creating Your Brand in Figure 1. This area gives you access to:
- My Dashboard, in which you can see what Tasks are assigned to you, any Conversations you are having with other team members, and see a list of what Activities you’ve performed.
- Project Settings, where you can:
- Archive your finished Project, after which you can retrieve it at any future time, or delete it if you see fit.
- Add Collaborators to your project. Each collaborator on a Project can be assigned one of these roles: Project Manager, ISD, Content Developer, SME, or Customer. As in Spaces, what each Collaborator can do will depend on their role.
- Edit the project Name, Description, and representative Image.
- Project Overview, where you can access a Status Board of any storyboards you are tracking, an Activity Stream that shows what has occurred thus far on the current project, and the other members of your team, who are called Collaborators.
The third step is Storyboards, with the Design Curriculum options. Here is where you put some thought into how your project will be organized, what learning objectives it will include, and outline the order of your courses, lessons and storyboards. Figure 2 shows the start of a Curriculum. You can choose to add any or all of the levels in your Curriculum to a list of storyboards to create.
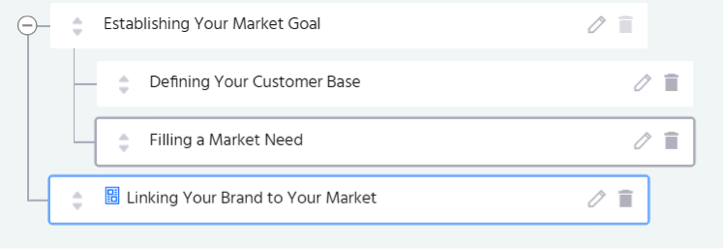
Figure 2: A Design Curriculum
To be clear, one storyboard here would be equivalent to one contiguous area of content, the same as one launchable option in an LMS. Most typically call this a Lesson, with multiple lessons making up a Module, and multiple modules making up a Course. A Lesson can have multiple Pages (or Slides). Any of the titles you listed in your Design Curriculum that you then assigned to be storyboarded will be listed here. See Figure 3.
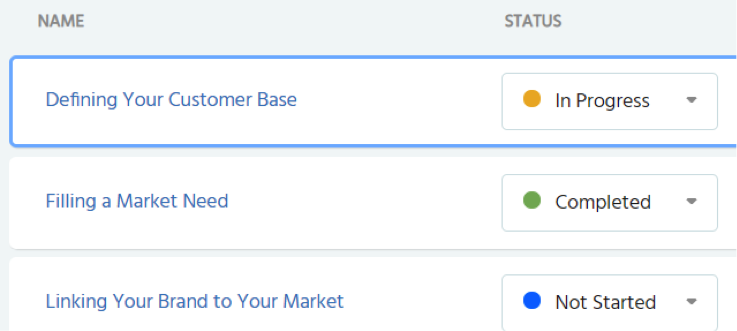
Figure 3: Working with storyboards
For each storyboard, you can set the status, add any pertinent files, write comments, and also export the full storyboard or audio scripts as PDF files.
Page Templates. You can now design as many page templates as you wish to be used in the lesson. Each template can be created by dragging blocks onto the page area. See Figure 4. Based on what you include, Xunto will also help you create a screen mockup to help further guide team members. This is a rough prototype or the layout of the page and any content you may want to include.
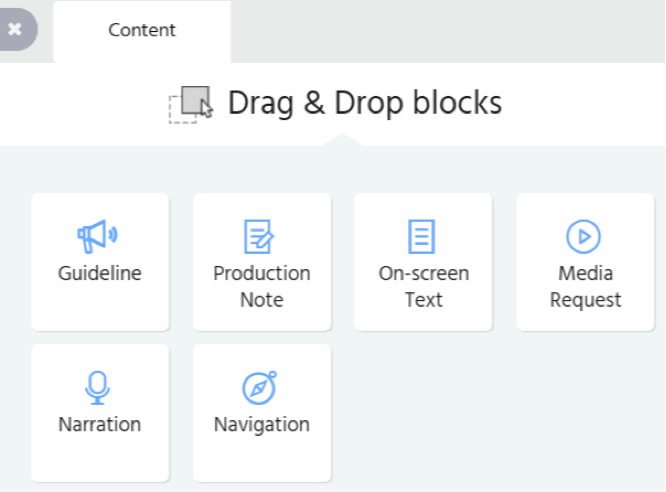
Figure 4: Page content blocks
Most of the options above offer an empty text box in which you can type or paste as much as you wish. Several formatting options, including hyperlinks, are available and each title (See Figure 5), such as Guideline, can be changed to your own term. This is as it should be, because storyboarding tools in the past that had fixed fields for these options would always fall short of expectations. However, each block also has some unique features. For instance, the Narration block lets you leave voice talent notes and pronunciation guides, you can limit the number of characters in the Onscreen block text, and in Media blocks you can provide reference material and host the final assets that will be required in production.
The blocks shown in Figure 4 above are the most essential. Xunto has declared that if other blocks are needed, they are happy to consider including those. However, as you now know, you can rename each block to whatever you wish, so I don’t consider not having more blocks available to be a big limitation. Xunto is planning on adding more blocks soon, specific to specific kinds of interactivity and question types, such as multiple-choice questions with all feedback fields, drag & drop exercises, and more.
One nice feature: every block can be assigned as a task to one or more team members.

Figure 5: Text Editing options
The only one of these blocks that has more structure to it is Navigation, and this also makes sense. See Figure 6.
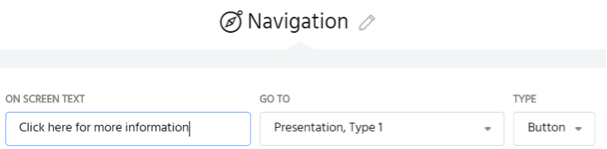
Figure 6: The Navigation block options
Example storyboard
Click here to see one example of a storyboard produced in Xunto.
More about Xunto
I’ve described most of Xunto’s functionality above, but it’s important to note a few more points:
- Everything you do can lead to reusable templates, storyboards, and more.
- All of the history of your project will also be available to you to analyze and improve on each new project. You can even see what a storyboard included at any point in history.
- Xunto includes a Preview feature that in my research seems pretty popular.
- As of the time of this writing, Xunto is FREE. Use it and learn it now while it’s free, and you’ll know if you want to continue to use it when pricing kicks in. My guess is that you will. Xunto’s pricing structure, which I expect will come into play at the start of 2020, seems very reasonable for the number of members, active projects, and storage space included. See Figure 7.
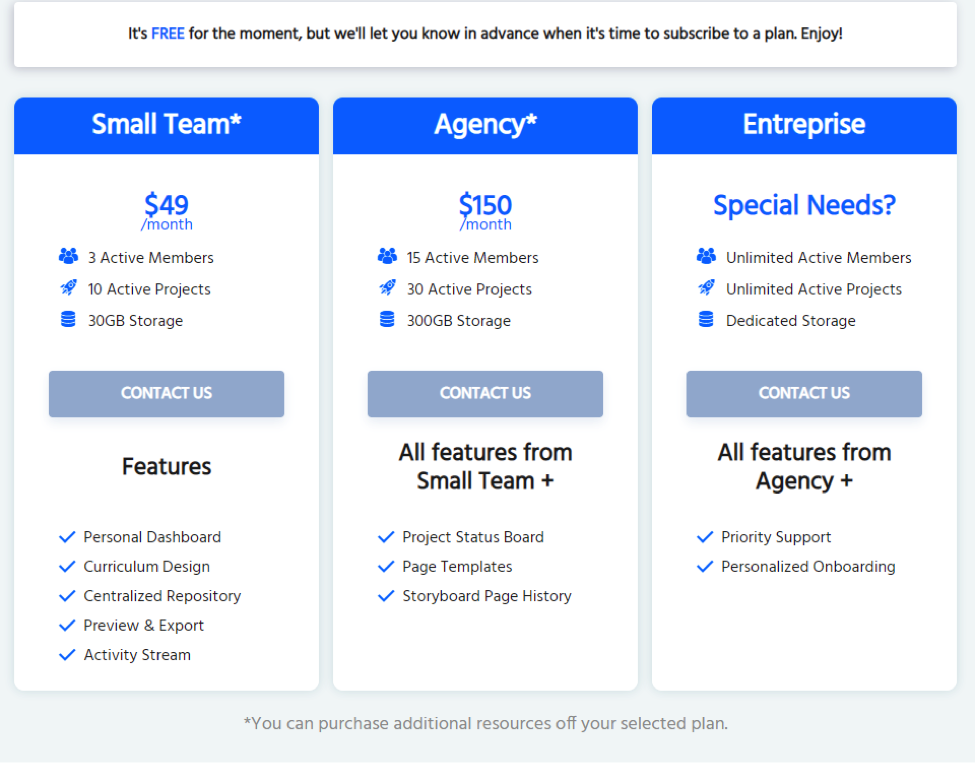
Figure 7: Xunto's future pricing
My final thoughts
Xunto is new. It’s obvious to me that the creators of Xunto know instructional design and put a lot of thought into the product. I’m looking forward to using it on client projects and having my eLearning projects run more smoothly and efficiently. I’m happy to finally have a storyboarding tool that doesn’t feel as if it has any of the restrictions I have seen in past tools, but it also covers many eLearning project management needs to boot! I hope to provide an update on my experience with Xunto in the coming months.