By now, you have probably heard that the eLearning Brothers (eLB), well-known for its library of character art, templates, and so many other reusable resources, recently acquired two companies: Trivantis and Edulence. For those of us who have used the authoring tools from Trivantis for many years, including Lectora and CenarioVR, this was big news!
Timed with news of the acquisition came the announcements that both Lectora and CenarioVR have been updated to new versions. I’ve reviewed both products before (here and here). This month I’m writing about the latest enhancements and additions, but first let me note that the price for both have been reduced. eLB is offering a Gold Suite that includes both the Desktop and Online versions of Lectora plus ReviewLink and full access to the eLB Asset Library for $1,299 a year. For only $300 more per year, move up to the Platinum Suite that includes CenarioVR, that wunderbar tool to create virtual reality experiences. That is a huge savings for CenarioVR over its previous cost of $1,068 for the Starter Plan and $1,596 for Pro Plan.
This month I’m discussing the major new features of Lectora 19. I’ll discuss the updates to CenarioVR in a separate review.
Lectora 19 – What’s new?
Long-time Lectora developers will appreciate the new features in Lectora:
- Lectora now has a timeline!
- You can now use a built-in screen recorder and editor.
- Lots of new templates have been added.
- Many more welcome additions.
Lectora’s new timeline
The timeline is a visual representation of any timed actions that you add to it. Here’s a simple example on how to use the timeline. Let’s say you have placed four characters, all initially hidden, on the screen and you want to reveal one at a time in turn. You can see the timeline at the bottom of the screen (Figure 1).
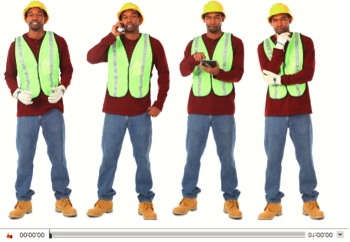
Figure 1: Four character positions
You could always use the action option in the properties ribbon for each character one by one, but the timeline simplifies this process and lets you create this exercise faster.
Click the little red icon at the left of the timeline to add an action. A timed event dialog will appear. In this case, I’ve set up the first character (Man 1) to show after five seconds. I’ve placed the dialog below the timeline so you can see how the timeline shows the event (Figure 2).
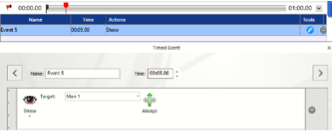
Figure 2: A new timed action
I’ve added three more timed events to the timeline to finish the effect on each character, one to occur every five seconds. Note that for the second, third, and fourth characters there are two actions; one to hide the previous character and another to show the new character. You can add as many actions as you like at any point in the timeline. Note the helpful tabs at the top of the timeline to show when these events will occur and how the events are named for the time stamps (5, 10, 15, 20). See Figure 3.
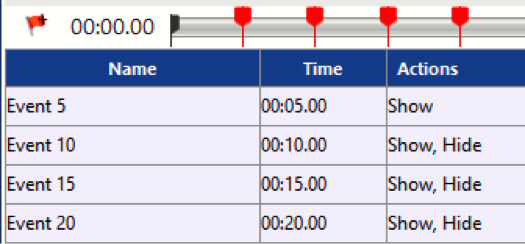
Figure 3: Four timed actions
To create timed events even faster, you can move the scrubber in the timeline to any position. When you click to add an action, it will already include the time stamp where you placed the scrubber.
Lectora’s new screen recorder and editor
In the past, Lectora was packaged with a version of Camtasia and Snagit, both great tools. If you are upgrading from Lectora 18 you’ll still have access to those two tools but won’t get any updates. Instead, there is a new recorder built directly into Lectora that is pretty awesome.
The tools ribbon now boasts a screen recording button. When you click it, a popup will appear that will give you many options (see Figure 4). You can:
- Record the screen (full or partial), the webcam, or both.
- If you want to use the webcam, you will be prompted to choose which one to use.
- If you want to record your voice and you have more than one microphone, you will be asked which one to use.
- You can record audio generated on the computer also.
- Several preferences can be set (Figure 5).
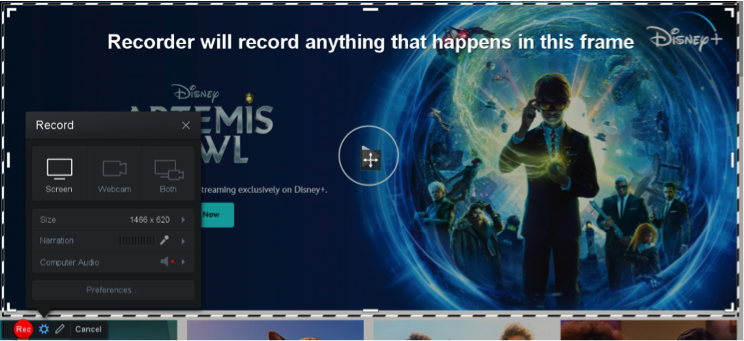
Figure 4: The recording window
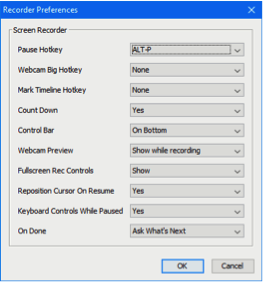
Figure 5: Recording preferences
- Note the pencil icon at the bottom of the recording dialog.
 It is called draw & zoom and I really like this feature. It allows me to draw shapes, add text, and zoom in on the cursor. You can pause the video to draw and type text or do it on the fly.
 - A handy guide is included. See Figure 6, which also shows the various dialogs that appear when you click the options. When you’re done, you can save the results as an MP4 in the background while you continue to work in Lectora.
- Of course, you can spruce up your video with images and text and apply transitions and animations. You can also edit narration, sound effects, music, and other audio.
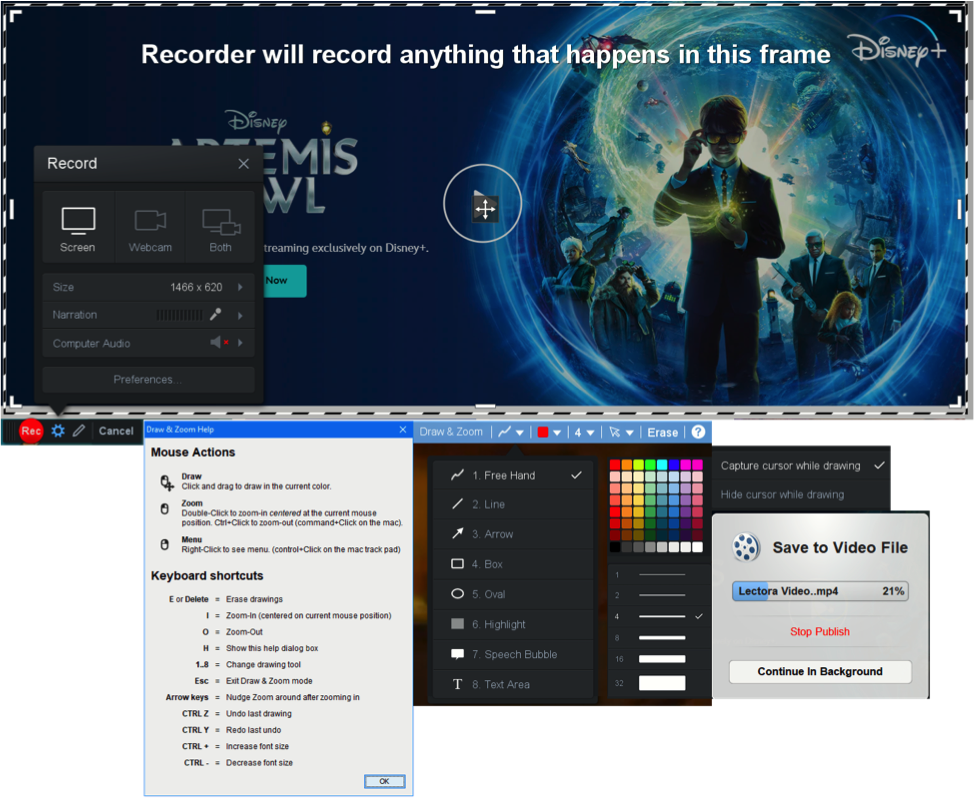
Figure 6: Recording options and dialogs
Lots of new templates
Many developers love templates because they can save them so much time and result in fewer bugs in the final product. Lectora 19 offers up hundreds of new templates that take care of multiple layouts, interactions, quizzes, and more. They are accessibility-compliant and already set up for xAPI and SCORM, so there is less for designers and developers to worry about. See Figure 7.
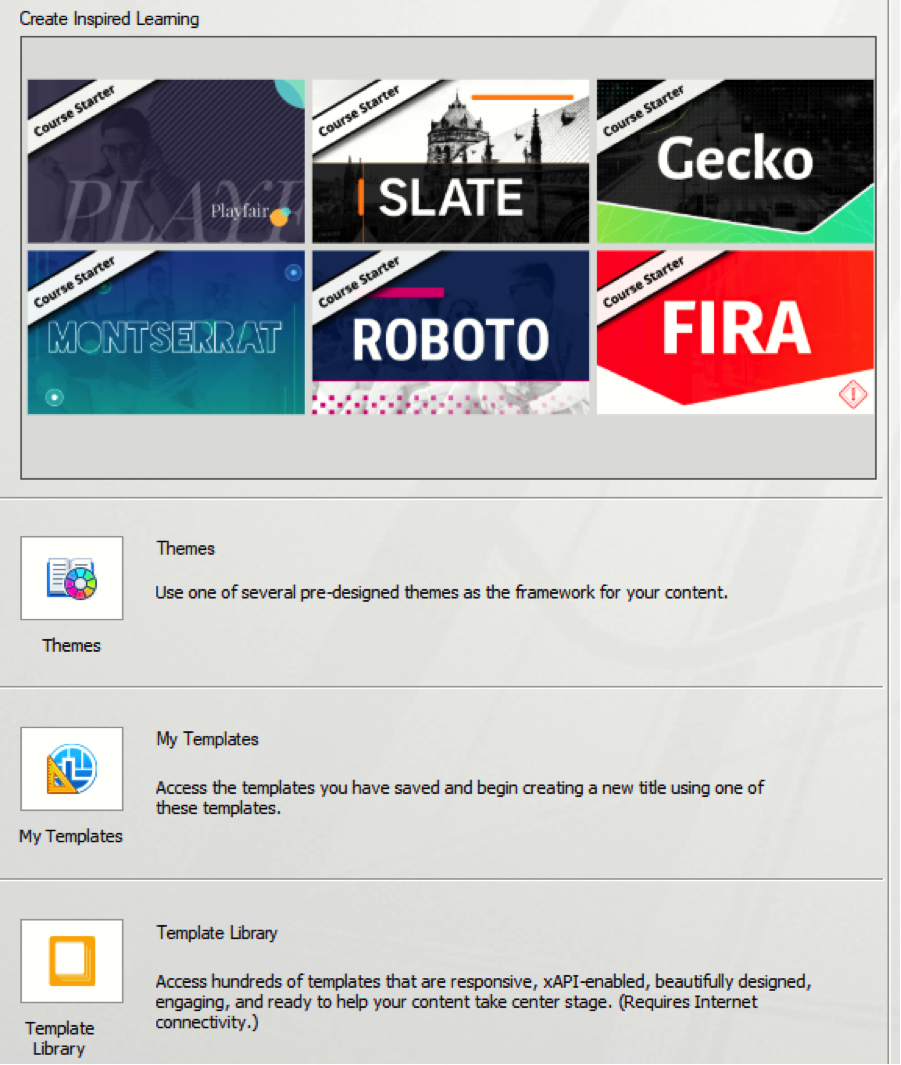
Figure 7: New templates
But wait, there’s more!
There are several other notable changes and additions:
- You can now create custom button states. A new set state action lets you change a button’s state when needed, such as when the user performs.
- There are now over 89,000 icons you can use in your lessons. They look really well-designed.
- The character object now gives you access to the eLB’s over 100,000 cutout characters. You can filter the characters by category, emotion, gender, and other attributes to find the ones you need.
- There are some nice new page background images to explore and use.
- You can now choose from a new library of button fill textures.
- The translation tool now supports the XLIFF format when importing or exporting translation files.
- When you publish a CenarioVR scenario to HTML5, you now import it into Lectora and track a number of actions in the scenario. This makes CenarioVR integration much tighter.
- Accessibility improvements: Lectora has for years provided the means to make your lessons accessible. This version continues to improve on this ability:
- Lightboxes now support Section 508 and WCAG so they can be read by screen readers and more.
- Form elements, including radio buttons and checkboxes that you create, now support WCAG and Section 508.
- Choose from various sampling rates for text-to-speech to set the quality level and optimize bandwidth.
- Set sizing options for desktop and mobile more easily with more options when publishing.
My take
I really like the new features I’ve discussed in this review and I look forward to implementing them in future designs. With the lower price to boot, you should seriously consider Lectora for your eLearning projects. What do you think? Add your comments below.


