A few years ago I wrote an article in Learning Solutions that was a guide to creating your first mobile application. As a big believer in hybrid apps—apps that you create once and then deploy to different platforms such as iOS or Android—I used the PhoneGap framework. Now, in many environments, the desktop app (or client) is making a come back—but the old problem of operating system diversity still exists. Few want to develop their app twice (or even three times) to cover all major operating systems. The answer is Electron.
In education environments where security or confidentiality is important, Electron—a cross-platform library that allows you to create and deploy apps using HTML, JavaScript, and CSS—would allow you to run HTML5-based learning content (regardless of the environment it was authored in) as you would any other application on a device. The desktop app could still communicate with LMS or other systems via the Experience API. Desktop-based education also allows enforcement of environmental-based restrictions that may be important in classified environments, or when working with information that simply should not be seen outside the organization.
The Electron platform allows you to “wrap” the apps you create and deploy them to Mac, Windows, and Linux machines. The ability to use web standard technologies is not a gimmick but has provided a workflow where development does not have to target distribution via a specific device. Apps such as Slack, Visual Basic Code, and Skype are written using the web standards (HTML, etc.) and wrapped as a desktop app using Electron.
Creating your first desktop app
This tutorial requires that you already have Node.js and Github installed on your machine. If you don’t have Node.js installed on your computer follow the easy installation instructions here. To install GitHub follow these instructions.
1) Create an empty folder that will contain your application. You’ll next need to open your command line application and navigate to that open folder. Remember that the cd command will allow you to change directory to move to the directory you just created. For convenience, I put mine on my desktop. Your command line should look similar to Figure 1.

Figure 1: The command line should look like this
2) Type the following at the command prompt, but don’t type the dollar sign—that represents the prompt itself.
<$ git clone https://github.com/electron/electron-quick-start>
3) After that command executes, we’re going to move into the new directory that was created that contains the Electron app.
<$ cd electron-quick-start>
4) Finally, we’ll install some additional dependencies and run our Electron app.
<$ npm install && npm start>
After you complete this step a rather uninspiring window that represents a tremendous feat will appear (Figure 2).

Figure 2: This is the application window
This window is your application running as a desktop application. It might look a bit like a web browser, but, it’s not— it’s an application window just like the one you run Excel or any other program in.
To exit, you can hit Control-C in the original command line window in which you were working.
Application structure
Looking at the directory structure of the app we just created, you’ll note that several new files were created in the process we just completed. (Figure 3)
 Figure 3: The app's directory structure
We’ll examine the important files. You might notice that the file extensions are familiar.
The first file we’ll open is the index.html file. This is the key file because this is actually the markup for the application that we created.
<!DOCTYPE html> <html>   <head>     <meta charset="UTF-8">

<title>Hello World!</title>   </head>   <body>

<h1>Hello World!</h1>
 <!-- All of the Node.js APIs are available in this renderer process. -->
We are using Node.js
<script>document.write(process.versions.node)</script>,
Chromium <script>document.write(process.versions.chrome)</script>,
and Electron <script>document.write(process.versions.electron)</script>.
<script>
// You can also require other files to run in this process
require('./renderer.js')     </script>   </body> </html>
?This file is what produced the output we viewed in the Electron window a few moments ago. We could alter this HTML just as we would when working with HTML on a website or within eLearning content. In fact, let’s do just that. Using a text editor, update the HTML so it appears similar to the code below.
<meta charset="UTF-8">
<title></title>
<h1>A First Desktop Application</h1>

<h2>Written by Mark Lassoff</h2>

<p>This application is written in HTML, CSS, and JavaScript</p>

<img src="Mark.png" />
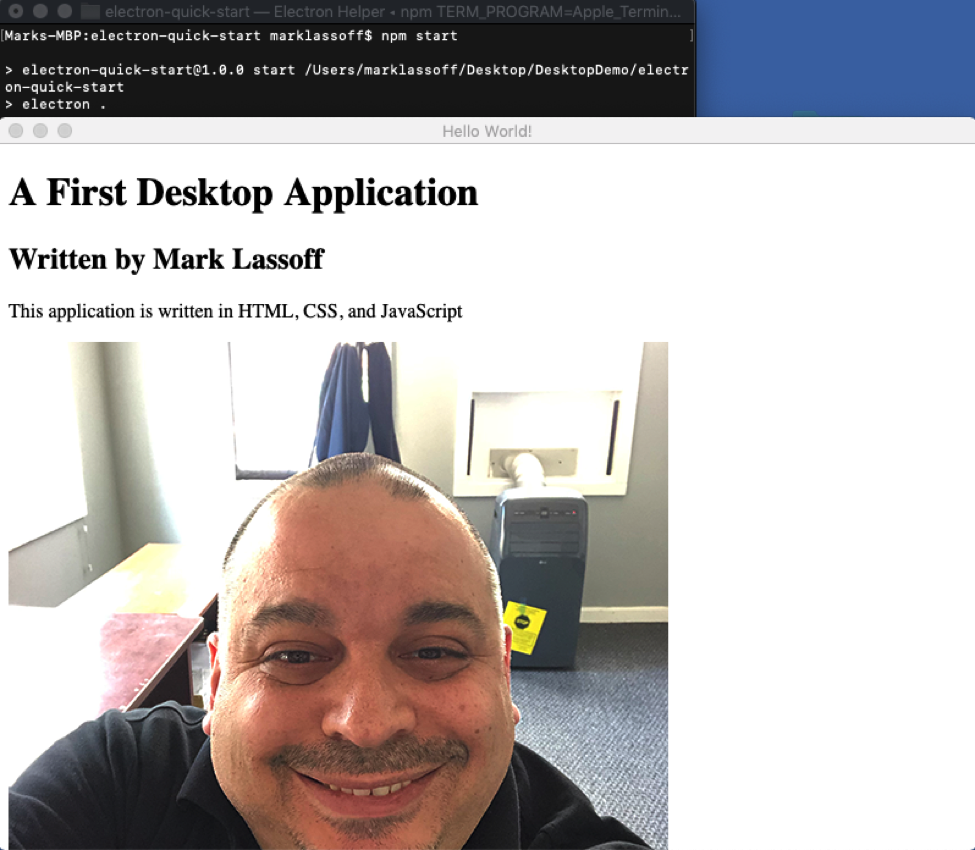
Take an image that you like and place it in the application folder that was created (the same one the HTML file is in) and replace Mark.png with the name of your image file. Once you've done this and saved your index.html file, you can go back to the command line and start up your program again by typing npm start. (See Figure 4.)
 Figure 4: This is the program window you just created
The window should appear again with your text and the photography you’ve selected. As you can see, to this point, the process is very similar to making a web site!
There are a couple of other important files that were created.
? main.js creates windows and handles system events
? package.json is the startup script for our app. It will run in the main process and it contains information about our app
? render.js handles the app’s render processes
Open the file main.js in your text editor and examine the following snippet of code.
<
function createWindow () {?  // Create the browser window.?  mainWindow = new BrowserWindow({?    width: 800,?    height: 600,?    webPreferences: {?      nodeIntegration: true?    }?  })
From context here, you can tell this is controlling the width and height of the window that opens for your desktop application.
Let’s make a real desktop application using this system. Again open your index.html. We’re going to replace the code with the code for a simple tip calculator. Copy and paste the code you see below.
<meta charset="utf-8">

<title></title>
<link href="https://unpkg.com/onsenui/css/onsenui.css" rel="stylesheet" />
<link href="https://unpkg.com/onsenui/css/onsen-css-components.min.css" rel="stylesheet" /><script src="https://unpkg.com/onsenui/js/onsenui.min.js"></script>
<ons-page>? <ons-toolbar>?</ons-toolbar></ons-page>

<div class="center">Desktop Tip Calculator</div>

<input class="text-input text-input--material" id="billAmount" placeholder="Bill Amount" required="" style="width:100%" type="text" /> ? <ons-range id="tipRange" max="50" min="0" step=".5" style="width: 75%;" value="18"></ons-range>? <output id="percentOut">18%</output> ? <ons-button id="btnCalculate" modifier="large">Calculate Tip</ons-button> <script>?    const range = document.getElementById("tipRange");?    const tipOut = document.getElementById("percentOut");?    const btnCalculate = document.getElementById("btnCalculate");?    const billAmount = document.getElementById("billAmount");?    const resultArea = document.getElementById("result");??    range.ondrag = function(){?      tipOut.innerHTML =  range.value + "%";?    }??    btnCalculate.onclick = function(){?      let theBill = parseFloat(billAmount.value);?      let tip = (theBill * (range.value/100)).toFixed(2);?      let total = (theBill + parseFloat(tip)).toFixed(2);?      let out = `<strong>Tip Amount:</strong> $${tip}<br/><strong>Total Bill:</strong> $${total}`;?      resultArea.innerHTML = out;?    }?    </script>
(If for some reason you weren't able to copy and paste the code, and you don’t want to type all this code—and I know you don’t—you can download it from https://gist.github.com/mlassoff/d6ba72969629673a0d15beb9704c28fe).
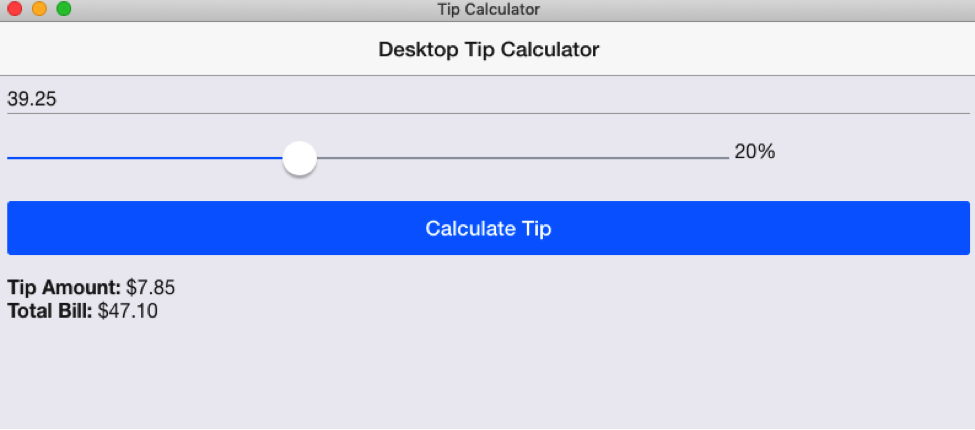
Once you have the code entered, save the index.html file. Once again go to your command line and start the program with npm start. Your desktop tip calculator will run. (Figure 5)

Figure 5: Here is the completed desktop tip calculator
With security becoming an increasingly important issue, more and more training will be coming to the security of the desktop. With Electron, we can create quality HTML5-based training that never sees the internet.


