Last month, I gave an overview of Articulate’s new 360 Suite, which includes both updated existing tools and new tools. I then went into depth on the updated Storyline 360 and discussed Articulate Review. This month, I’ll cover the other tools you see in Figure 1. Again, the suite features four desktop tools, including the Storyline update; four web-based tools, including Articulate Review; and one iPad app called Preso.
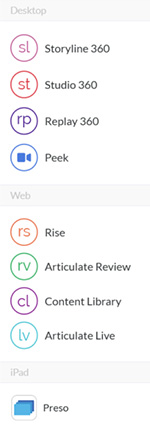
Figure 1: The tools in Articulate’s new 360 Suite
Studio 360
Studio 360 includes Articulate Presenter, Engage, and QuizMaker. It is the update to Articulate Studio ’13.
Presenter
It can be argued that this PowerPoint add-in is how Articulate first made its mark in the learning tools market. First offered in 2002, it has continued to be a popular tool for eLearning developers. As a PowerPoint add-in, it provides a ribbon of options that you use to enhance your PowerPoint files. See Figure 2.

Figure 2: The Presenter ribbon
In 360, Presenter has improved in the same areas as Storyline 360:
- There are many more characters available than in previous versions (and more will be added over time) through the new Content Library.
- The Content Library also offers many slide templates (and these too will expand in the future).
- Like Storyline, a Translate option will let you export text to an external Word document, make changes therein, and then import the updated text. However, this works only with text that is part of the items you inserted from Articulate. (PowerPoint has a separate utility for translating other text.)
- You can now publish in four different ways. See Figure 3.
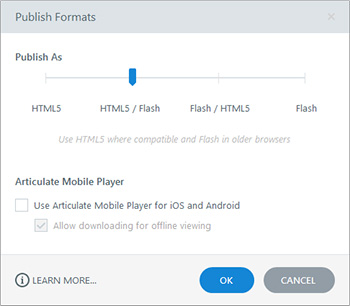
Figure 3: The new publishing options
In addition, a few other improvements have been made to Presenter.- The narration editor has had a big upgrade: a timeline, as you can see in Figure 4. This makes synchronizing animations and annotations much easier. You can also now rearrange the panels in the narration editor.
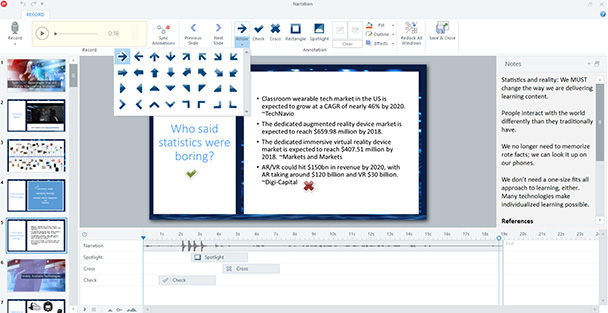
Figure 4: The narration editor
- Like Storyline, Presenter’s HTML5-published files are somewhat responsive, meaning that on mobile devices the content will adapt itself to the screen size and orientation of each device. You are not able to customize each view, so you cannot change the positioning or sizing of options; be sure to test the published files on your mobile devices to see if you need to change the size of screen objects in the desktop view so that they are not too small in other views. However, you can also lock the published lesson to just show in portrait, landscape, or both.
- As part of Studio 360, you can publish your files online to Articulate 360 and share the URL with reviewers, who can enter comments online via Articulate Review.
Replay 360
Replay has not changed much. Articulate did add a few useful editing options, as seen in Figure 5. As before, you can mix video of yourself from a webcam and a screen recording, then edit, mix and match with additional audio, images, videos, and lower thirds. One feature I see lacking here is the ability to brand or customize the resulting video skin in any way. That’s not a problem for some folks, but it’s a show-stopper for others. You also cannot change the background behind you in Replay, even if you use a green screen.

Figure 5: New editing options in Replay
Peek
Peek is also a screen-recording application, available for both Mac and Windows, that creates (noninteractive) video demos. Think of it as a light version of Replay. It doesn’t record from your video camera, just screen actions. If you choose to have Peek launch on startup, it will always be available in your system tray. Whenever you click it, the dialog seen in Figure 6 will appear, in which you’ll see a snapshot of the last recording performed and the time when that recording occurred. Click the New Recording button, much in the same way that TechSmith SnagIt works, and you’ll see a snapshot of all open applications and screens. Note in Figure 7 that I have three screens and it shows I’m able to choose any of them for full-screen recording. If you open any other applications while this dialog is up, the dialog will show those too.
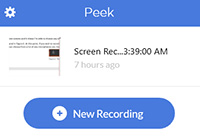
Figure 6: The Peek dialog box
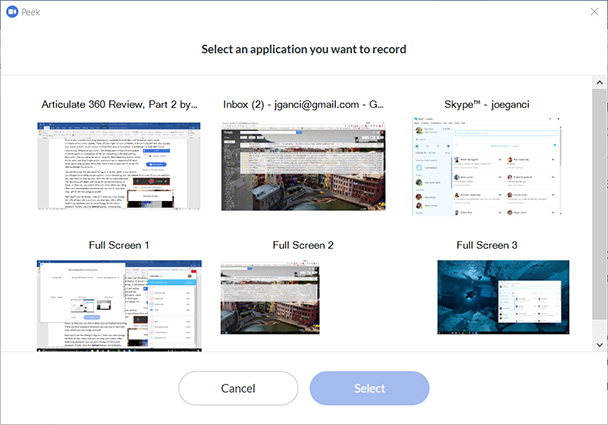
Figure 7: Choose a screen or open application
You will then see the thin panel in Figure 8. At this point, if you wish to record your voice while capturing your screen recording, you can choose from a list of any microphones you may have on your system. Click the red “record” button; the recording will begin and the word Cancel will change to Done, so that you can click it when you’ve finished recording. There are also keyboard shortcuts you can use to start and stop, which you can assign yourself.

Figure 8: The Peek recording panel
Next you’ll see the dialog in Figure 9. Here, you can now change the title of your video and play your video. After beginning playback, you can also change to full-screen playback. Finally, click the Upload button. Immediately, you’ll be able to access your screen recording, share it with reviewers, and save it as an MP4 file on your local drive.
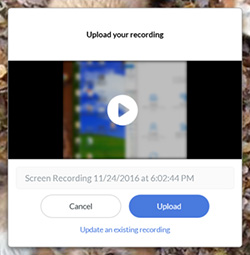
Figure 9: Upload options from Peek
Rise
A new addition to Articulate’s cloud-based tools, Rise is nothing like the other tools in the suite. It’s made to be simple, which means it’s not as powerful as Storyline, but it’s more powerful than Studio.
The first step in setting up a Rise project includes:
- Titling your course
- Choosing whether the learner can navigate freely or must follow the order of the lessons and activities
- Uploading your logo
- Customizing the theme, which includes the font and color schemes
You can always return to change the above by clicking Settings.
Next, you create your course structure. Note you don’t have to do this all at once. You can add lessons as you go.
Each lesson can comprise a series of activities, as seen in Figure 10. You can’t mix and match these on one screen as you would in Storyline (or Presenter). Rather, the learner will move from one activity to the next. Activities include (Figure 10):
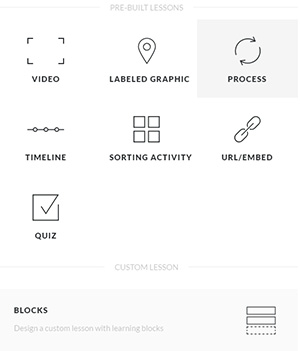
Figure 10: Lesson choices
- Video: You can upload videos and then choose which one to show. You can also insert videos that have been uploaded or published to Articulate 360 (from, say, Replay, Preso, or Peek) directly via this lesson type. In fact, when you load (or publish) videos to Articulate 360 in any manner, not only can you comment on them via Articulate Review, but you can also insert the videos directly into a Rise course or export them back out with an LMS wrapper. That means you can create a SCORM (or xAPI) package and track it via your LMS.
- Labeled graphic: You can provide an image and markers and have the learner click the markers to learn more.
- Process: You can provide a title, description, or audio that you record or upload, and one of the following: an image, a video file, or a weblink. The weblink will show a bit of text from the site and let the learner click it to open the link in a separate tab, unless it’s, say, a YouTube link. This will embed the YouTube video right within the lesson.
- Timeline: You can define a number of events that have occurred, such as in your company history, and put them in the order you wish. In each case, you have the same options as you do with the Process activity. They will be shown in the order you specify. Note that it’s up to you to put the dates in order; this does not happen automatically. It’s nice that when editing the timeline, you can click the event number to edit it (see Figure 11), but it would be even nicer if learners were able to click the numbers to jump to that date’s event.
Figure 11: Timeline events
- Sorting: You can define a few categories and a number of items in each. The learner will then be able to drag each item into the correct category. If incorrectly placed, the item will vibrate and be placed back on top of the pile of items. At the end, the learner will be told how many were correctly placed.
- URL: You can type or paste a URL and part of the website will be shown, usually an image and description text. The learner can then click to see the entire website in a separate tab or see it within the lesson when you use an embed code.
- Quiz: You
can let the learner answer a series of multiple-choice questions. In each case,
it appears you can have as many distractors as you wish (I tried up to 14 with
no problem), but you can have only one correct answer for each question. You
can provide one text feedback for the question, which will be shown whether or
not the learner answered correctly, or you can choose to not provide feedback.
You can also show an image as part of the question.
While you’re editing, all the questions are shown in order on the left side of the screen, and you can drag them up and down to reorder them.
There is a Settings option for each quiz that lets you choose: whether to show feedback and the correct answer after each question submission; how many tries the learner should have to pass the quiz (from one to 10 or unlimited); what the passing score is; and whether to randomize all the questions and/or shuffle the answer choices.
You can have multiple quizzes in a course. Each is scored separately. - Blocks: Unquestionably the most powerful of the options allowed, this area lets you choose to assemble a series of blocks in linear fashion, from those you see in Figure 12. Some of the blocks are interactive; others are to display text or an image. All of the blocks include several options. For instance, the Interactive activity currently includes Accordion, Tabs, Flashcard Grid, Flashcard Stack, Button, and Button Stack. Buttons, by the way, can allow learners to jump to a different lesson or to a website outside of the course.

Figure 12: Block activities
Rise lends itself more to responsive design. Whereas neither Storyline 360 nor Rise allows you to customize each view individually (desktop, tablet, and mobile; portrait and landscape), the nature of Storyline is to design a screen where the learner normally doesn’t have to scroll up and down, nor left and right. When shown in a portrait mode, Storyline leaves gaps at the top and bottom so as not to change the aspect ratio of the content. Rise, on the other hand, functions like a responsive website because we usually don’t mind scrolling up and down on websites. Therefore, it has more freedom to make each view fuller, with no large gaps. In short, the way you build learning in Rise makes it easier to present itself as responsive. Rise automatically detects screen sizes and flows the content accordingly. Therefore, there’s little need to customize each view. The tradeoff is that you are using a preset approach.
See Figure 13 for an example of each.
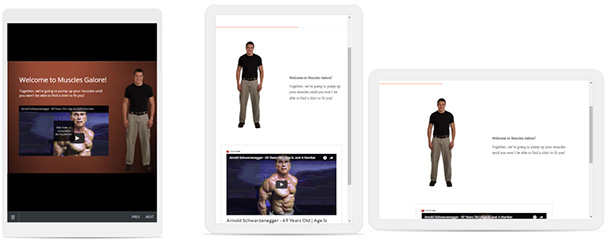
Figure 13: On the left, how a Storyline slide looks in portrait mode on a mobile device; on the right, how Rise looks in both portrait and landscape views
A word of warning: If you make a mistake in typing a URL for a website or choose the wrong image to show, in most cases you cannot simply edit the URL or swap the image. You must delete the link or the photo and try again. This can be annoying, so take care to enter the correct information the first time. On the other hand, if the URL you typed doesn’t exist, you are told so and allowed to try again.
Content Library
Last month I showed how you can access the Content Library from within Storyline, and I also mentioned at the start of this review that you can access the Content Library from within Presenter as well. You can also view the Content Library online. Though you cannot download templates and characters from the online Content Library site, it’s a good way to peruse what’s available to download from within Presenter and Storyline. See Figure 14.
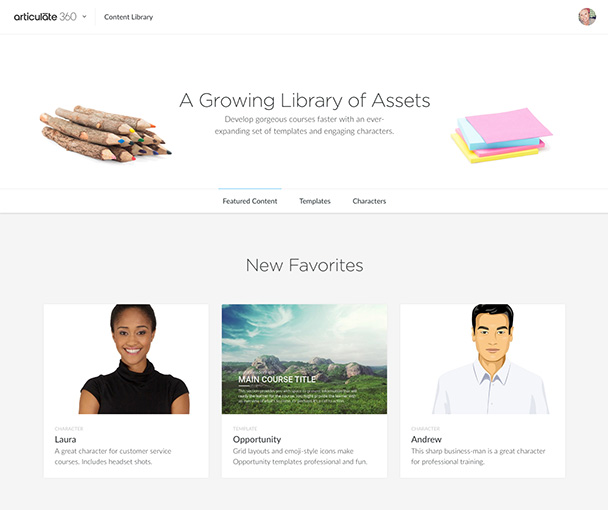
Figure 14: The Content Library options
Articulate Live
This site lets you choose from upcoming free live training events, each about an hour in length. There doesn’t appear to be a way of accessing recordings of past events except by those who attended the original events.
Preso
Preso is a new app that runs on iPads. It allows you to create training presentations by combining text and images and drawing on the screen. You can also import from any PDF file, though this makes most sense if the PDF file was generated from a slide-based application like PowerPoint. You may also record audio on each slide. See Figure 15.
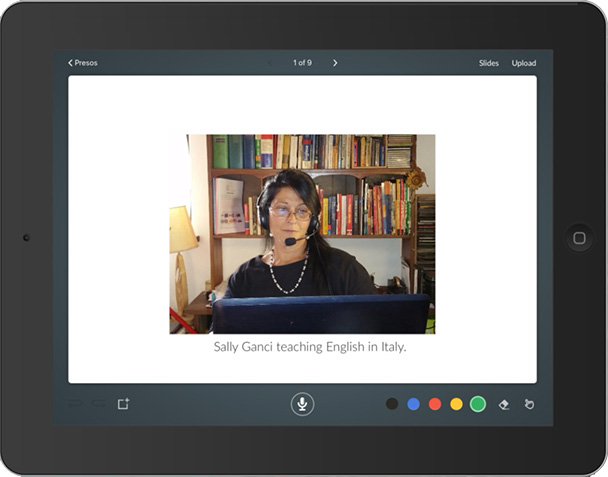
Figure 15: The Preso iPad app
Preso is easy to use, and you can make some attractive presentations with it, but it is limited in several ways. You cannot insert videos or interactions of any kind. The colors you see on the bottom right are for freeform drawing on the screen, but you’re limited to the colors you see; and there is no control over line thickness or constraining lines to be straight or form a polygon, so drawing a rectangle or a circle would be difficult.
Preso does include multiple undo/redo options, which is nice. The eraser tool to the right of the color choices lets you erase a part of the slide or the whole slide. Of course, you can position and resize images on the slide. Text options include color and size, but not font choice, nor other formatting such as boldface or italics.
One odd aspect I found in Preso is that once you record audio for a slide (you can’t import audio that has already been recorded), it is basically locked down at that point. All the other options disappear, so you can’t make any changes to the slide nor add any more elements to the slide. If you do need to make changes, you must discard the audio you recorded. In other words, you shouldn’t add the audio until the slide contents are all included, sized correctly, etc. There is no Save option; everything is automatically saved.
Preso lets you reorder the slides and upload the presentation to Articulate for others to review and comment on your presentation at your invitation.
I believe Preso is a nice utility, but it needs a lot more in terms of features to truly be useful in more cases.
Pricing
See my review last month for pricing and discounts.
My thoughts
All in all, Articulate has created a suite of updated and new products that the company hopes you will find attractive in terms of features and pricing with its new subscription model. Those who do tend to use several of the tools will benefit from a cost savings, especially because Articulate will continue to update the products with new features. Like most subscription models, however, when you no longer need the tools, you’ll no longer have access to them, including Storyline and Studio.
It may seem a bit disingenuous to include as part of the suite the ability to view the Content Library, because you can’t download from it except from inside Storyline or Studio, or to include Articulate Live as a tool when the free webinars have always been available as part of Articulate’s community outreach, though now these webinars will be held each and every week. In short, there are really only two tools in the web category, not four, but I do find it nice that Articulate has tried to position everything under one umbrella. I would suggest that, rather than just a link to upcoming webinars, they also include the link to the full Articulate community because that has always been one of Articulate’s greatest strengths.
Have you checked out Articulate 360? Are you using it? Tell us what you like and don’t like about it in the comments below.


