


At an xAPI gathering at TorranceLearning in May 2019, we hosted a MakerSpace. The afternoon task was to get a robot to send xAPI statements—in two and a half hours. During this time, participants were coming and going as they pleased.
We divided the task into three stages:
- Create a driving test
- Write the xAPI statements
- Test to ensure that the code was working
The robot
Our robot, built from an Elegoo Smart Robot Car Kit that costs around $70, had been assembled for a talk at the Rochester (Michigan) Full Stack Meetup on JavaScript and the internet of things.
Since the talk, the robot had acquired further enhancements: Using a Raspberry Pi-based credit card-sized computer, the robot was running an on-board web server so it could be controlled over the internet. The server asked for the driver (the participant/user) to provide an email address, and it then provided two options for controls. These are still very much at the Minimum Viable Product (MVP) stage. We’d also added a second power source. With these enhancements, the cost reached a grand total of around $100.
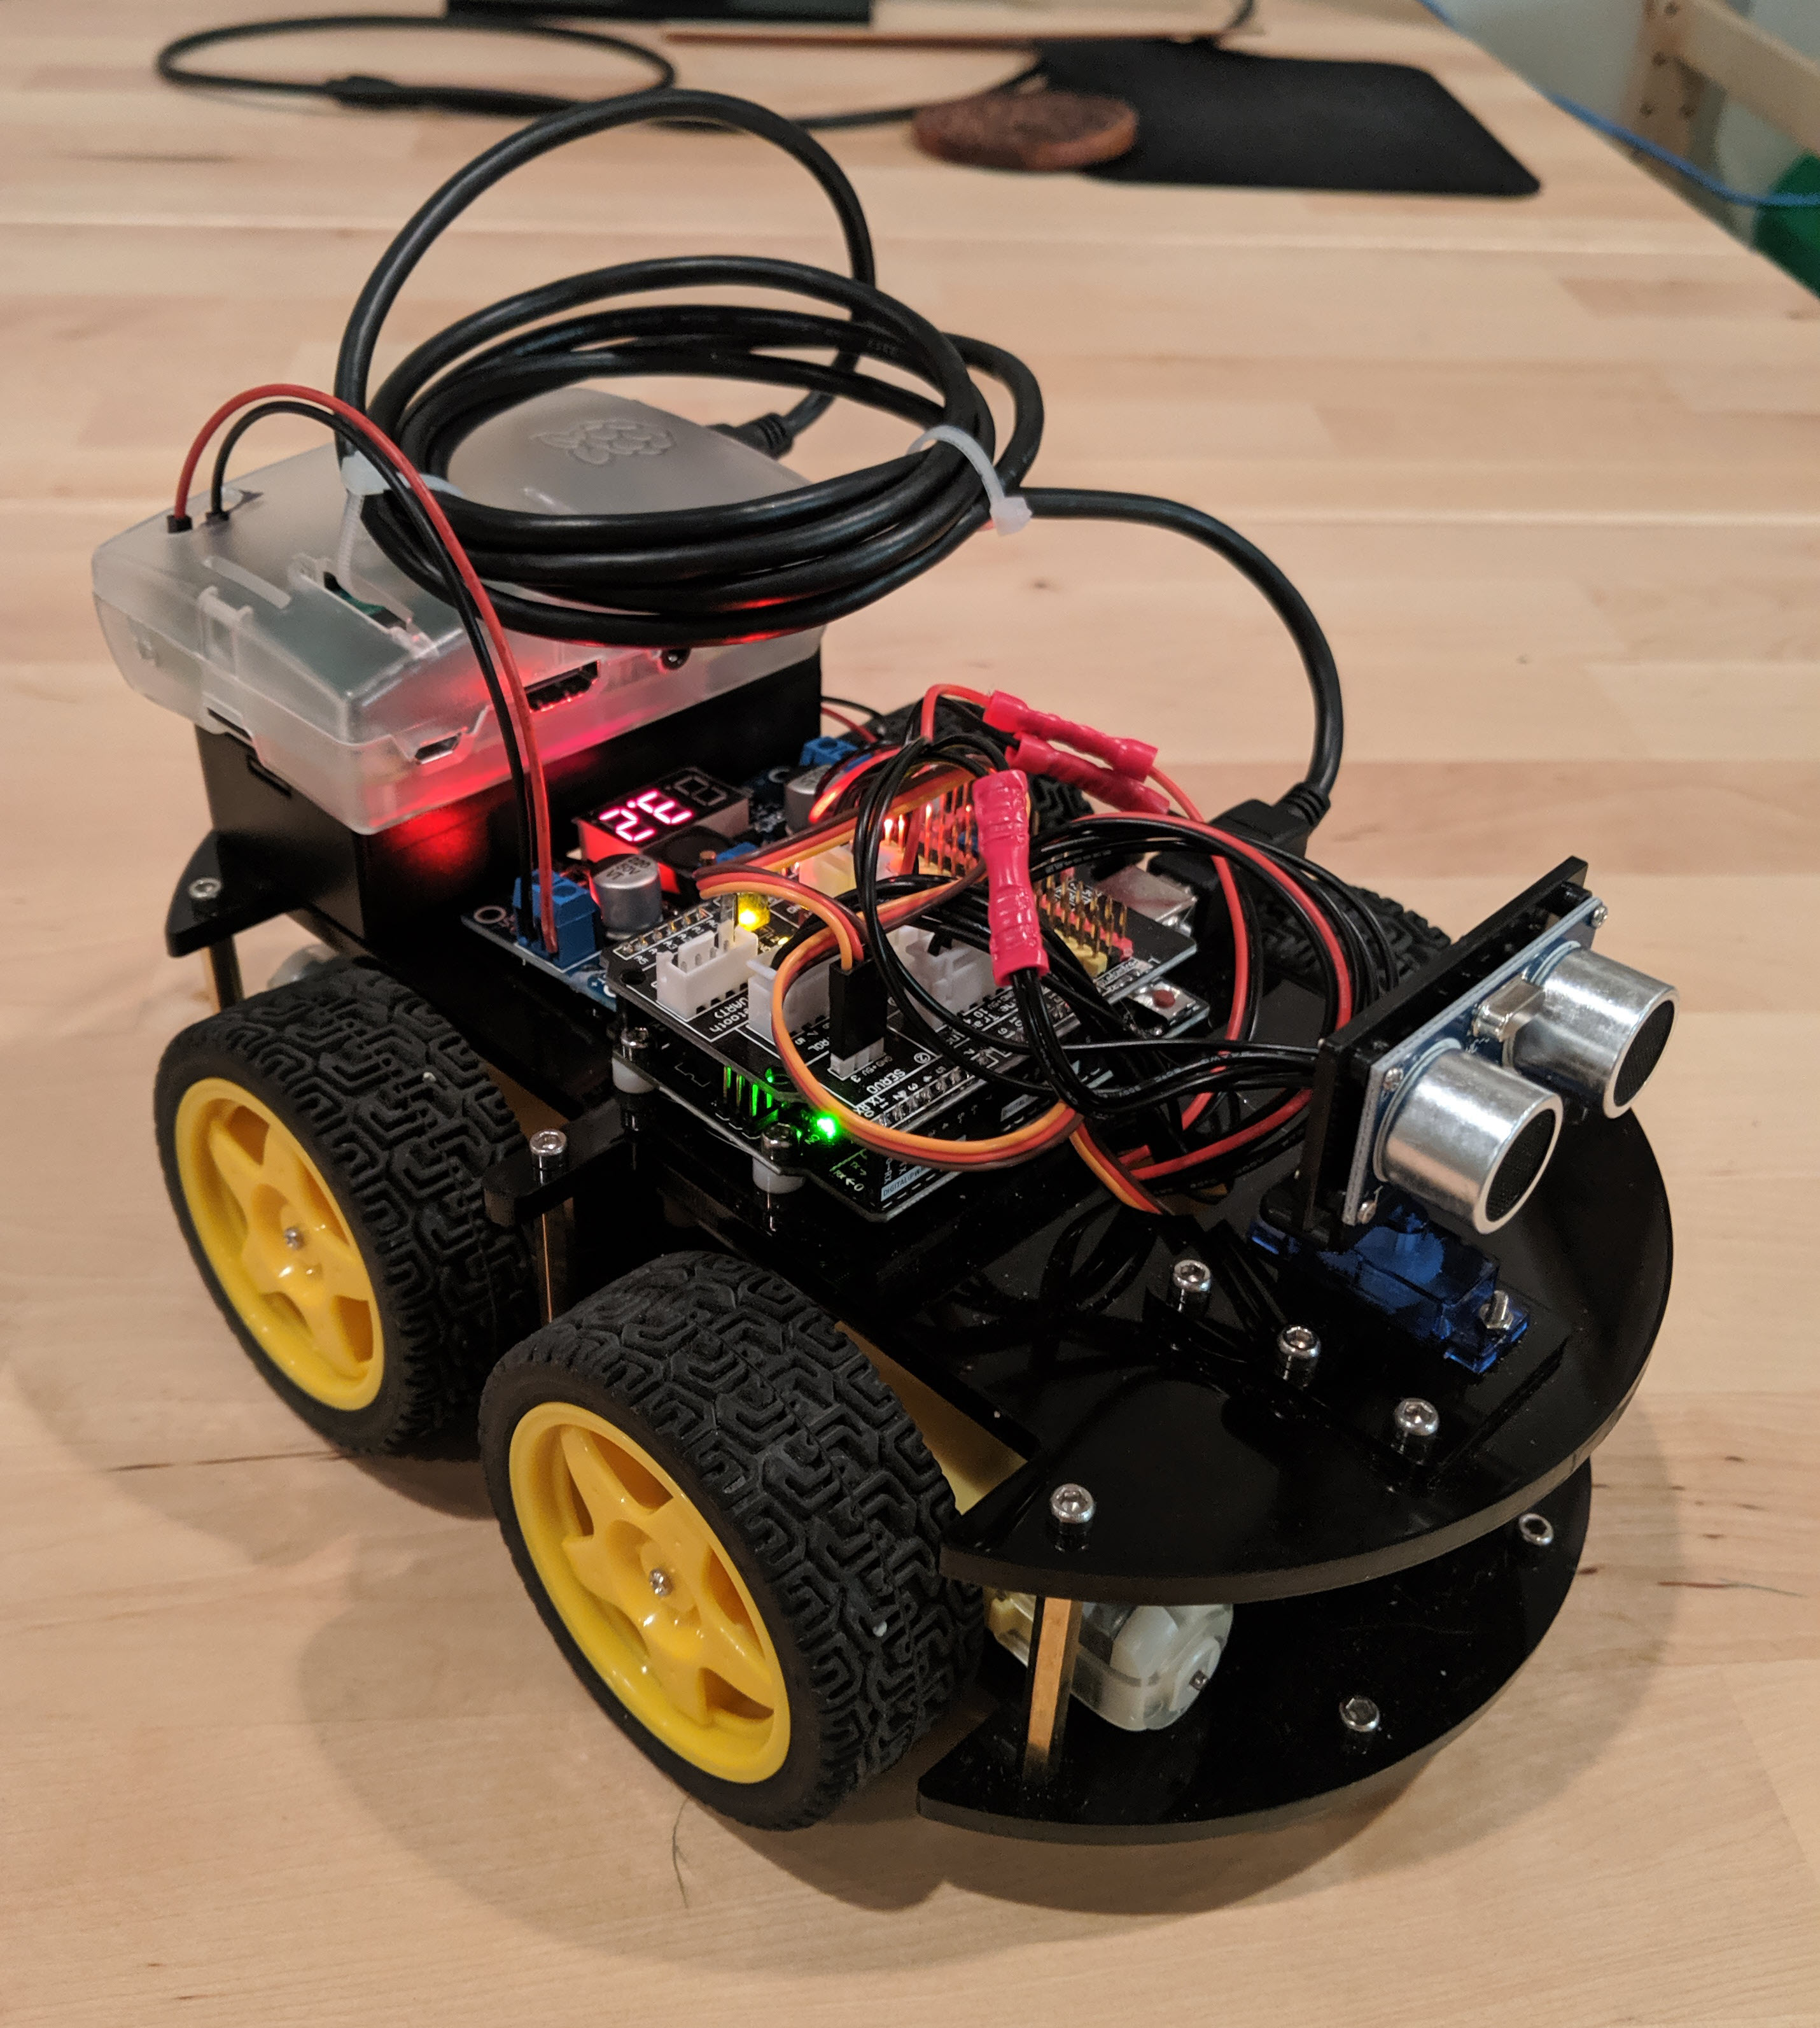 Figure 1: The robot
The driving test
The MVP controls provided options for single or dual stick controls. Participants tried out both sets and found that the single-stick mode seemed to work better, but the robot could run away from them quickly.
Because of the limitations of the controller, we settled on a very simple path for the robot to run. A user would drive the robot along a very simple curved path to a vertical target, a case of Dr Pepper.
The sensors on the robot could detect when a user crossed onto the black tape edge of the path, and a distance sensor could detect the vertical target. This was complicated enough to get some interesting results, but straightforward enough that a first-time user would have a chance of reaching the Dr Pepper.
 Figure 2: The robot car sits at the starting line
At this point, we had a reasonable performance test: The ultimate goal was to drive the robot around the curve and to the Dr Pepper case. We decided to measure:
- How long it took to reach the Dr Pepper
- How many times the car veered off the path
The xAPI statements
Since we had only two and a half hours to formulate our statements, these are fairly simple; there is definitely room to expand and improve upon these.
We decided to create just a few concise statements that would feasibly fit in our time restrictions. We defined Actor, Verbs, Activities, and relevant Context.
Actor was already set to go. As mentioned earlier, each user provided an email address (and an optional name), which we sent along as the actor.
Verbs were keeping track of four different actions.
- Launched: User was logged in and ready to drive.
- Terminated: User had logged out.
- Completed: User had reached the goal (the Dr Pepper).
- Triggered: The robot’s sensors picked up the black tape on either side of the driving path.
For Triggered, we opted to define a new verb, as none of the verbs in the Registry really fit our use case.
The xAPI protocol uses Internationalized Resource Identifiers (IRIs) as IDs for verbs, activities, extensions, and other elements. An IRI has a familiar-looking format because it’s similar to a web address (URL); in the case of xAPI IDs, however, these don’t necessarily represent online resources, but the format provides unique, hierarchical identifiers that show what things are and where they belong.
Some identifiers go into the xAPI Registry but most never will—because the first part identifies who it belongs to, that organization is responsible for the meaning. That’s part of the extensibility that gives xAPI much of its power. The new verb we defined for Triggered will be managed in-house. It is:
https://torrancelearning.com/xapi/verbs/triggered
The robot had three sensors on the robot: left, middle, and right. We set up Activity IDs for these objects by following Andrew Downes’s Data Governance advice from the xAPI Cohort and blogs. Launched, Completed, and Terminated used the driving course itself for their objects. Like Triggered, these use the IRI format:
Driving course:
https://torrancelearning.com/xapi/activities/xapi-party/robot/course1
Sensors:
https://torrancelearning.com/xapi/activities/xapi-party/robot/sensor/left
https://torrancelearning.com/xapi/activities/xapi-party/robot/sensor/middle
https://torrancelearning.com/xapi/activities/xapi-party/robot/sensor/right
The two other things to consider were the time elapsed when a sensor was triggered or the goal was reached. Since we had no way to measure distance, this provided useful context. We set this up as:
http://id.tincanapi.com/extension/time
We also set up a curb check count:
http://torrancelearning.com/xapi/extensions/xapi-party/robot/curb-checks
This counts the number of times a user triggered a line sensor, keeping in mind that driving completely off the course would trigger all three sensors, while a slight veer may only trigger one.
Testing the code
Because the robot was already up and running with Node, we were able to quickly integrate xAPI support with the TinCanJS Node Package.
The rest of the process went quite smoothly. After the basic statements were sent, we added a bit more description to the Activities. As the party wrapped up, we had a complete run from Launched to Completed, and a few people came into the MakerSpace to test the robot.
Most LRSs (learning record stores) will display the data in reverse chronological order. Here’s an example of the start-to-finish run for one user, MB:
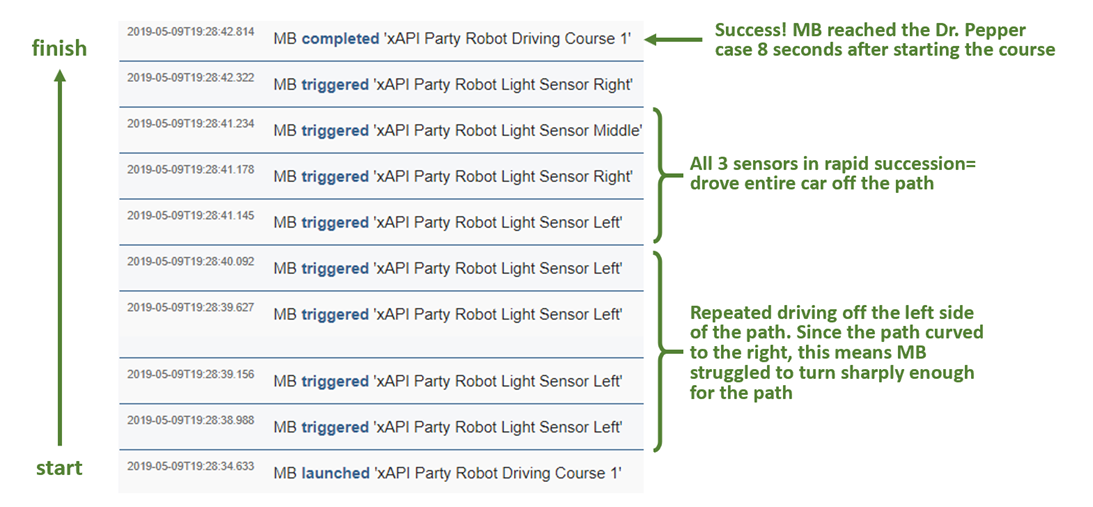 Figure 3: A list of xAPI statements for user “MB”
What’s next?
There are many ways to take this further, both with and without xAPI.
- Enhancing control, for example steering by tilting the control iPad, or refining the interface to allow for greater speed control
- Sending speed information whenever a sensor is triggered
- Adding a “Start Driving” button to provide a better sense of how long the user actually spent on the driving test
- Sending a termination or successful completion notice—several times we missed the fact that the task completed, and the user kept driving
- Offering different driving modes, for instance having the robot stop if it leaves the path
- Data visualizations could show a user’s performance with sensors triggered along a timeline
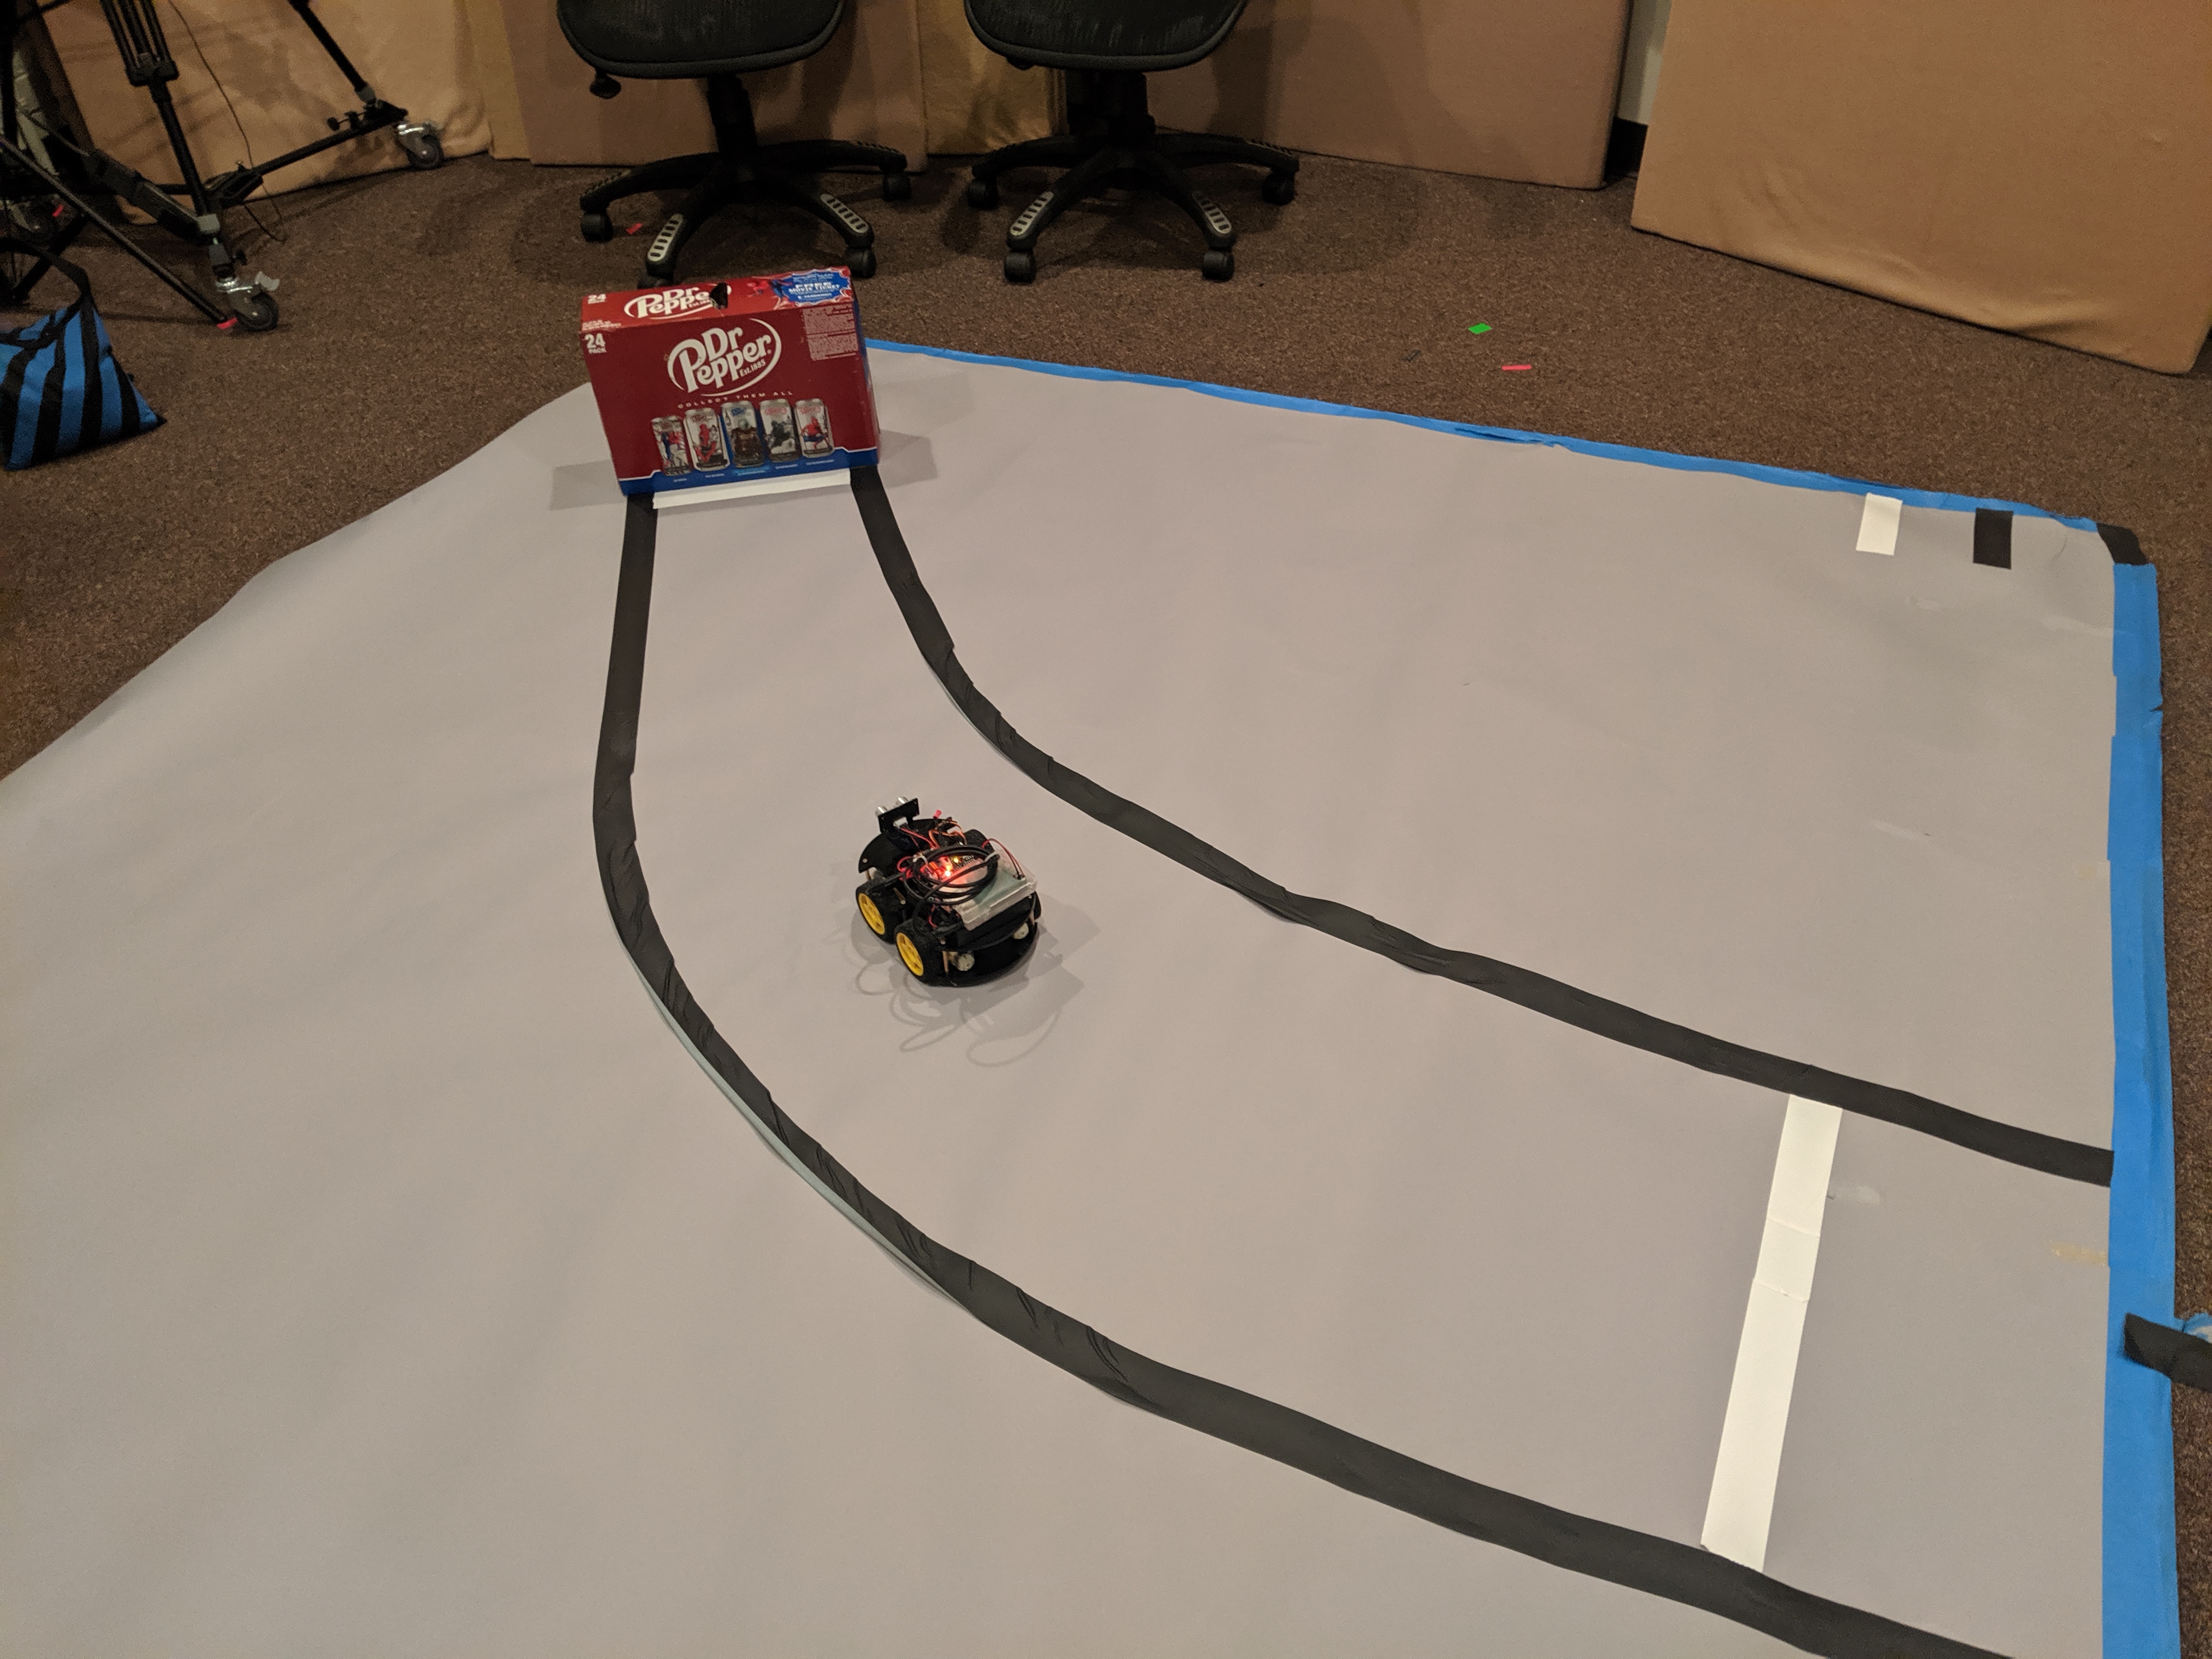 Figure 4: The robot approaches its target, a case of Dr Pepper
Learn more about xAPI
Learn more about xAPI by downloading The eLearning Guild's newest research paper, 2019: The State of xAPI Adoption. Megan Torrance, CEO and founder of TorranceLearning, used survey data to investigate the current state of xAPI adoption, providing insights and recommendations for solution providers and L&D professionals.