When planning 360-degree video eLearning experiences and training simulations, we need to consider where we want visitors to look. We also need to guide or lead visitors through the experience in subtle ways that allow visitors to feel like they’re really in the scene and in control of their experience. To do this, we must pay close attention to the following three factors: composition, location, and camera placement. In this article we explore how these factors are related, define key terms, and discuss best practices for implementation.
Composition
Composition can be thought of as “the layout and relative position of the objects within a shot” (Wohl). Unlike in 2-D video, there is no defined, static rectangular frame that contains the entire experience. Thus, traditional 2-D filmmaking compositional concepts such as the rule of thirds don’t apply to 360-degree video. Similarly, Point-of-View (PoV), Point-of-Interest (PoI), and narrative also work very differently in immersive environments. As a result, our approach to making 360-degree videos will look different and operate under a completely new set of rules.
While 360-degree video doesn’t have a defined frame, the visitor still has a personal frame, or field of view (FoV). This FoV moves dynamically, centered on the visitor’s gaze as they look around the environment. Thus, we can use architectural features such as doorways, windows, etc. to provide real world boundaries, create visual guiding lines for our visitors, and compose a dynamic FoV for each moment experienced by each visitor.
Spherical compass and quadrants
When composing a dynamic FoV, we must define our spherical compass and decide where “north” is for a particular learning experience. Knowing where our visual north is will help determine the camera location, choreography, object placement, and audio north.
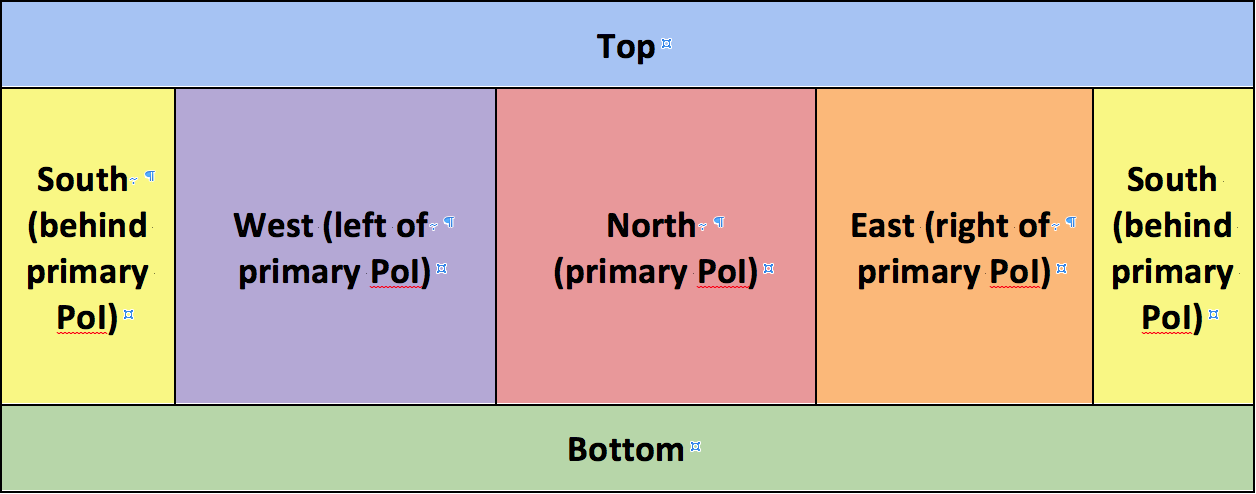
With north determined, we can now divide the space surrounding the camera into four quadrants: north (typically the primary PoI), south, east, and west. (see Figure 1) We may even decide to add sections for up and down depending on the eLearning experience. Quadrant designation helps with understanding where a visitor might look and what they might see.
 Figure 1: Quadrant layout when viewing an equirectangular frame
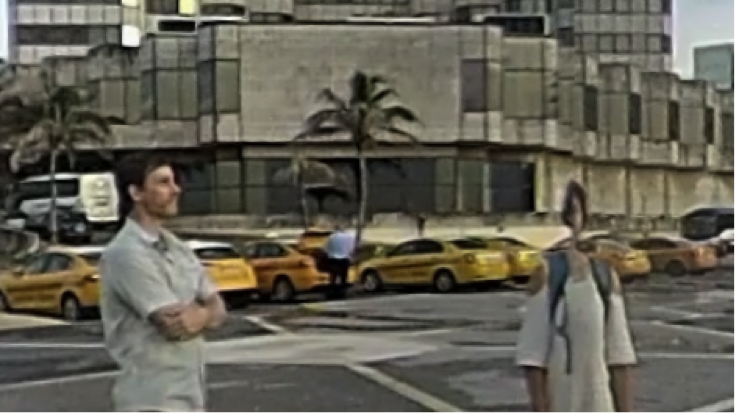
We must consider what other elements to include within 100 degrees FoV (50 degrees to the right and left, or roughly what will appear in a visitor’s peripheral vision in a VR headset) of our PoI to either direct attention toward or limit distractions from the PoI. Also, we should place actors and PoI at least three feet (i.e., one meter) from the camera when we can. This will help reduce any potential stitching issues and create a more natural sense of depth (i.e., improved parallax). We must keep actors and PoI away from the stitch lines (i.e., points halfway between the camera lenses) so the images don’t become severely distorted. (See Figure 2) Also, the crew should either exit the scene or stand behind the camera opposite the main PoI.

Figure 2: Don’t lose your head over stitch lines
Unfortunately, we’re not always able to control the placement of objects and people within a physical space. This is especially true in training simulations and videos, where walls, machinery, furniture, etc. will need to be placed in the scene as realistically as possible. Therefore, our choice of location in which we choose to shoot and camera placement within the scene can be more important than the composition of the scene.
Location & camera placement
Because of the lack of a static frame in any given virtual environment, location and camera placement become our primary tools for guiding the visitor’s focus. First, we need to treat and even “cast” the location and camera as characters in our story, as these are the “characters” our visitors will ultimately experience and embody. In determining our location, we need to consider specificity (i.e., which room/s within a building and why), uniqueness, lighting/exposure, and depth or distance of action.
One consideration for determining camera placement is “spin budget.” In other words, how much does a visitor need to spin their head or whole body in order to view the experience? Our goal is to place the camera in a location that doesn’t require visitors to turn their heads more than normal. If visitors “spin” too much, it could ruin the sense of immersive presence and even cause nausea. As a result, it’s often best to place the camera in a corner or side of a room instead of directly in the center.
We should avoid placing the camera in locations where learners wouldn’t find themselves in real life. For example, a person wouldn’t stand in the middle of a dinner table nor on top of a robotic arm, so we probably don’t want to put a 360-degree camera in those places either. That could be disorienting and ineffective. Instead, we need to deliberately place the camera where learners will actually stand, such as in front of an equipment control panel. Further, we must avoid placing the camera within the “helpless distance” (i.e., so close to objects and actions that it’s frustrating we can’t interact).
Summary
Unlike with traditional 2-D film, 360-degree videos record an entire scene without a defined frame so there’s only so much we can direct and control. Fortunately, composition, location, and camera placement are three critical creative factors we can control. Designing our 360-degree video eLearning experience while emphasizing the medium’s greatest strengths and minimizing its weaknesses will help us guide the visitor’s experience in subtle ways. This will, in turn, enable us to more effectively educate and inform with more engaging content.
If you'd like to learn more about creating 360-degree video eLearning experiences, you'll definitely want to check out our hands-on workshop, BYOD: Introduction to Creating Interactive 360-degree Videos in Unity, at Realities360 on April 2.
Resources
Wohl, Michael. The 360-degree Video Handbook: A Step-by-Step Guide to Creating Video for Virtual Reality (VR), Second Edition. Los Angeles, CA: Vrrrynice.com, 2019.


